Sunday, August 9, 2015
It's been too long!
Wow, it's been over 3 years since I've posted anything. I've been making a whole bunch of stuff but I just haven't been motivated to blog about it. I'm going to see if I can change that and get back into this.

Friday, April 20, 2012
The Raven

I started out by painting a background on a 16x20 canvas. The top part is a deep purple, almost black.
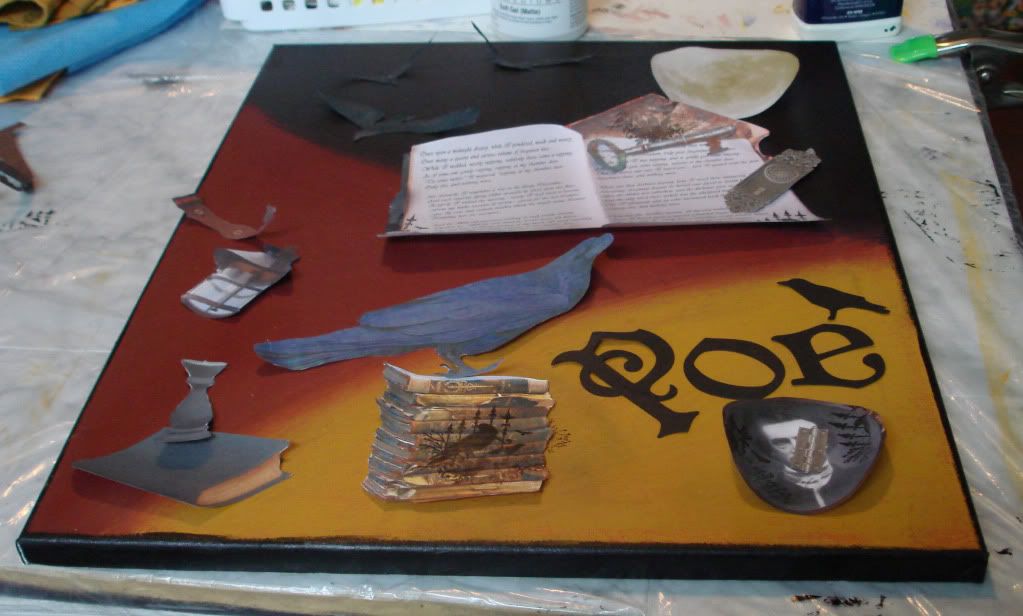
I collected images that I wanted to use and did a little embellishing to them with markers and rubber stamps.
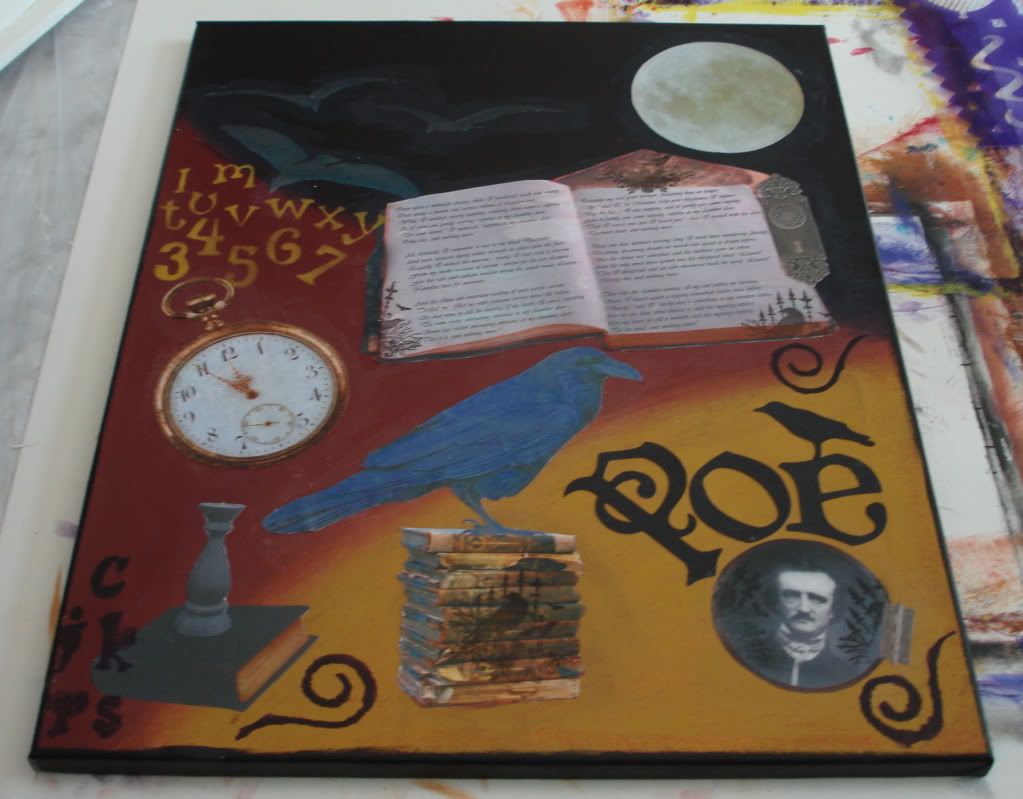
Once all the images were glued down I did some more painting and stenciling.

I use a thin layer of modeling paste where ever I want some texture.
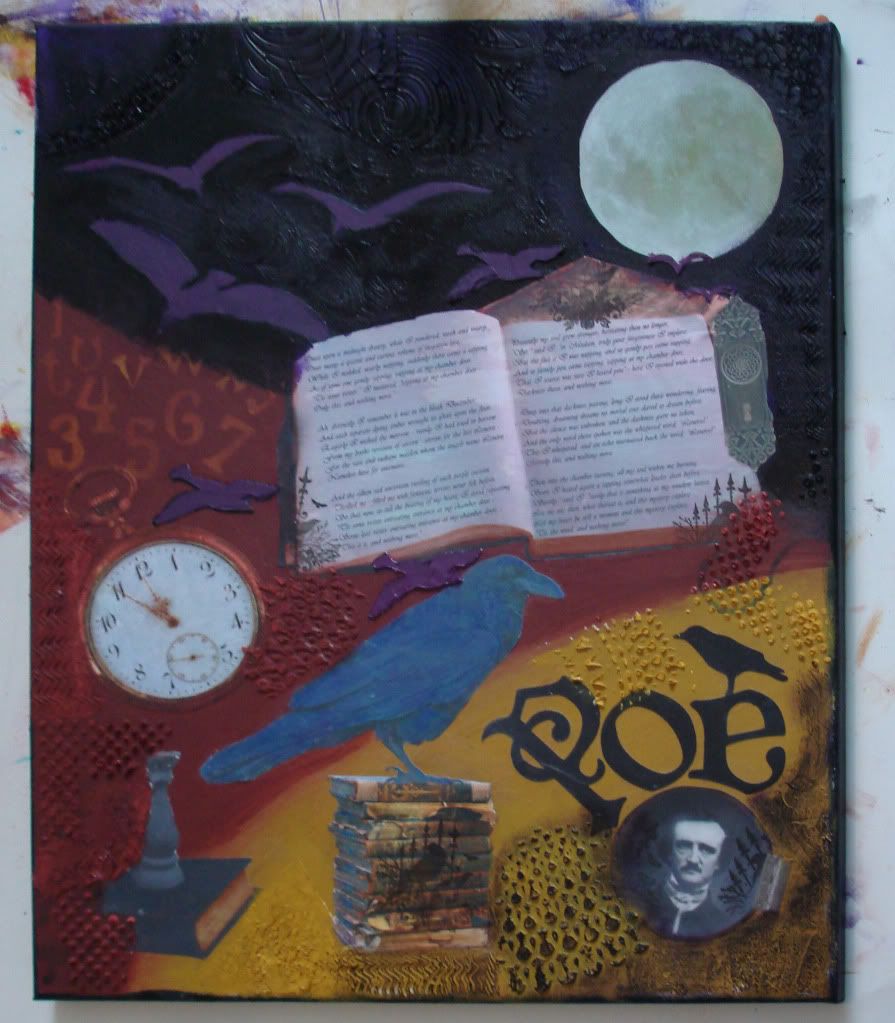
Once the modeling paste is dry I paint over it and blend it in to the background. I add metallic paints and glazes for the final steps.
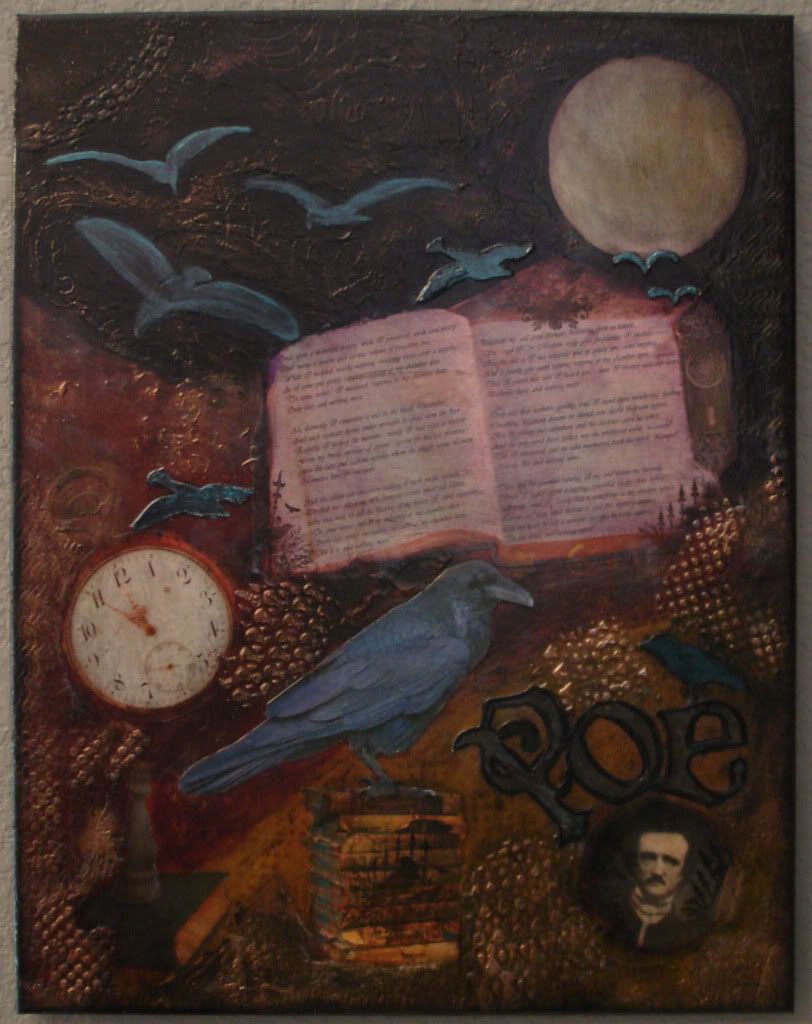
I enhance what I like and cover what I don't until I am happy with the end result.
Monday, March 26, 2012
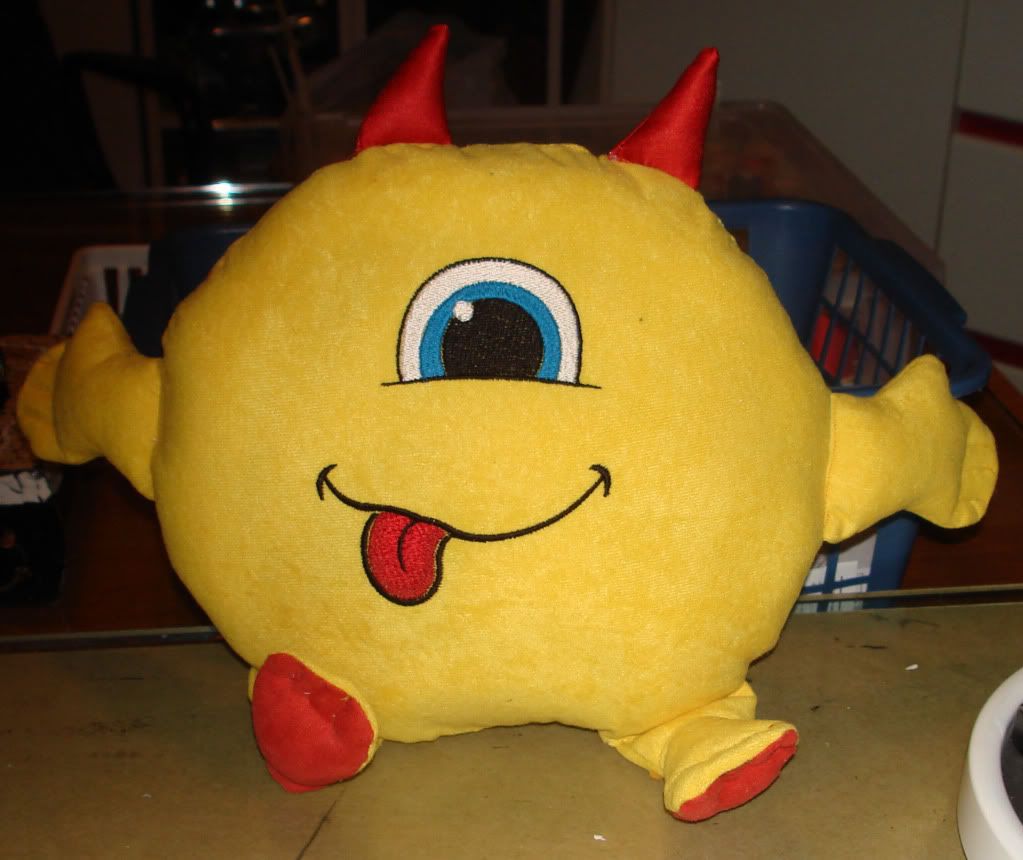
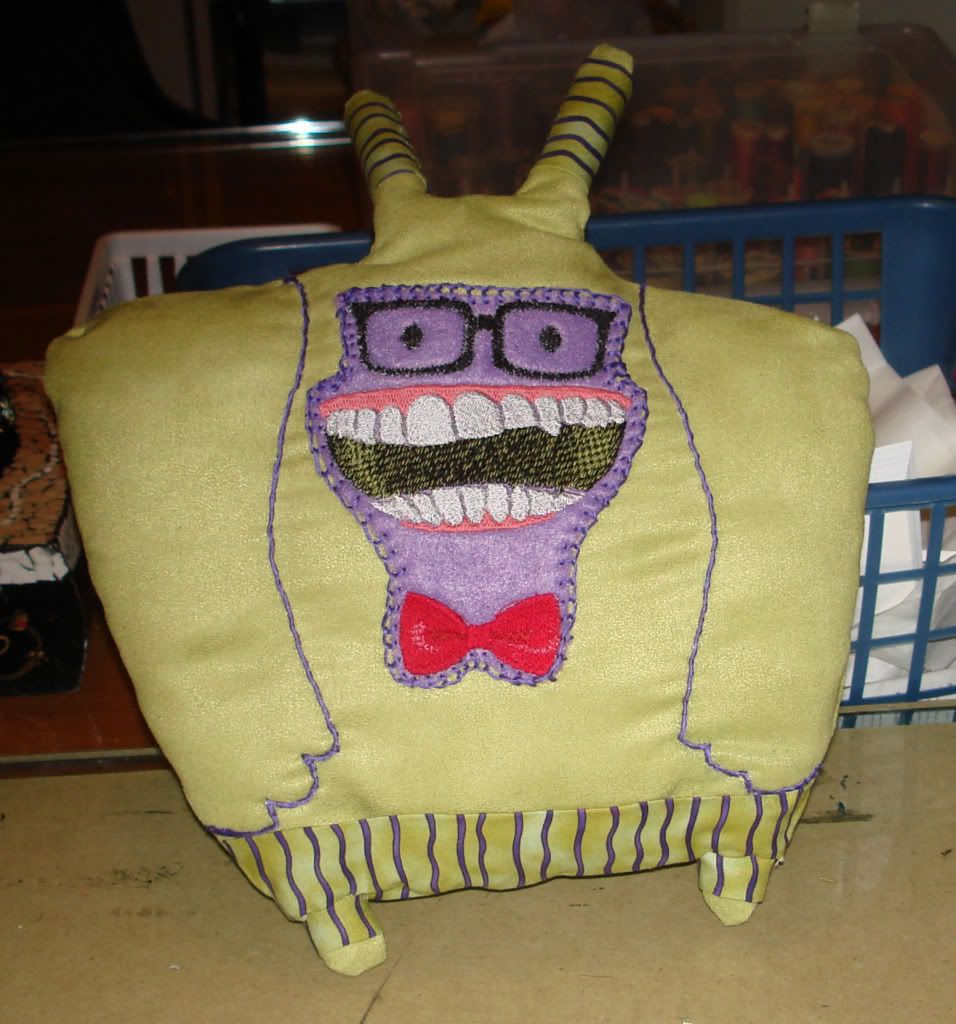
Monster Mash
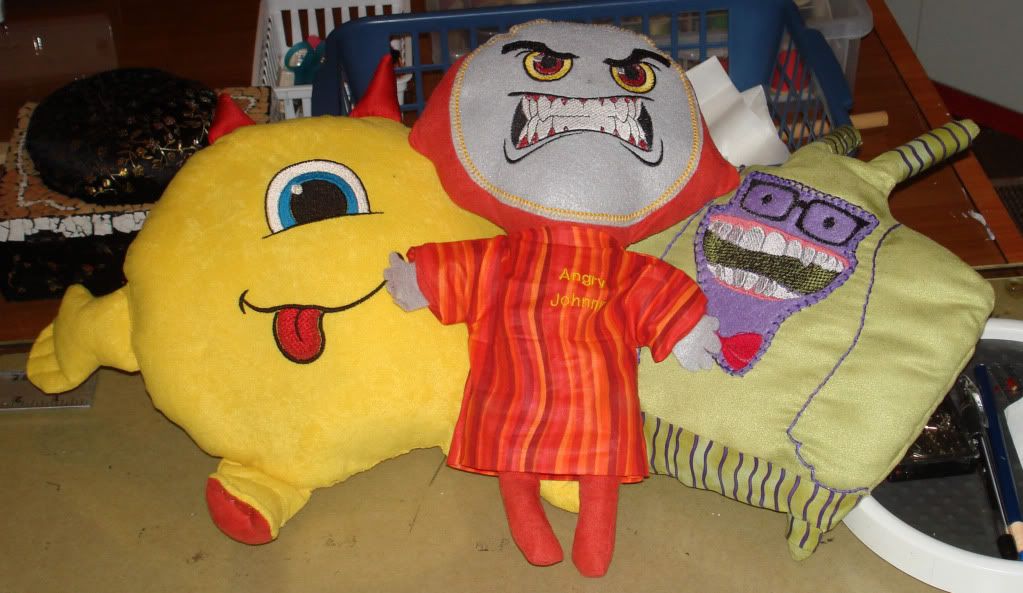
My favorite embroidery site, Urban Threads came out with a monster face pack that I just had to have. It inspired me so much! I have never made a toy or stuffed animal before and I didn't have any idea how to start. First I made a trip to the fabric store and got some soft bold colored remnants and a couple matching patterned fat quarters.
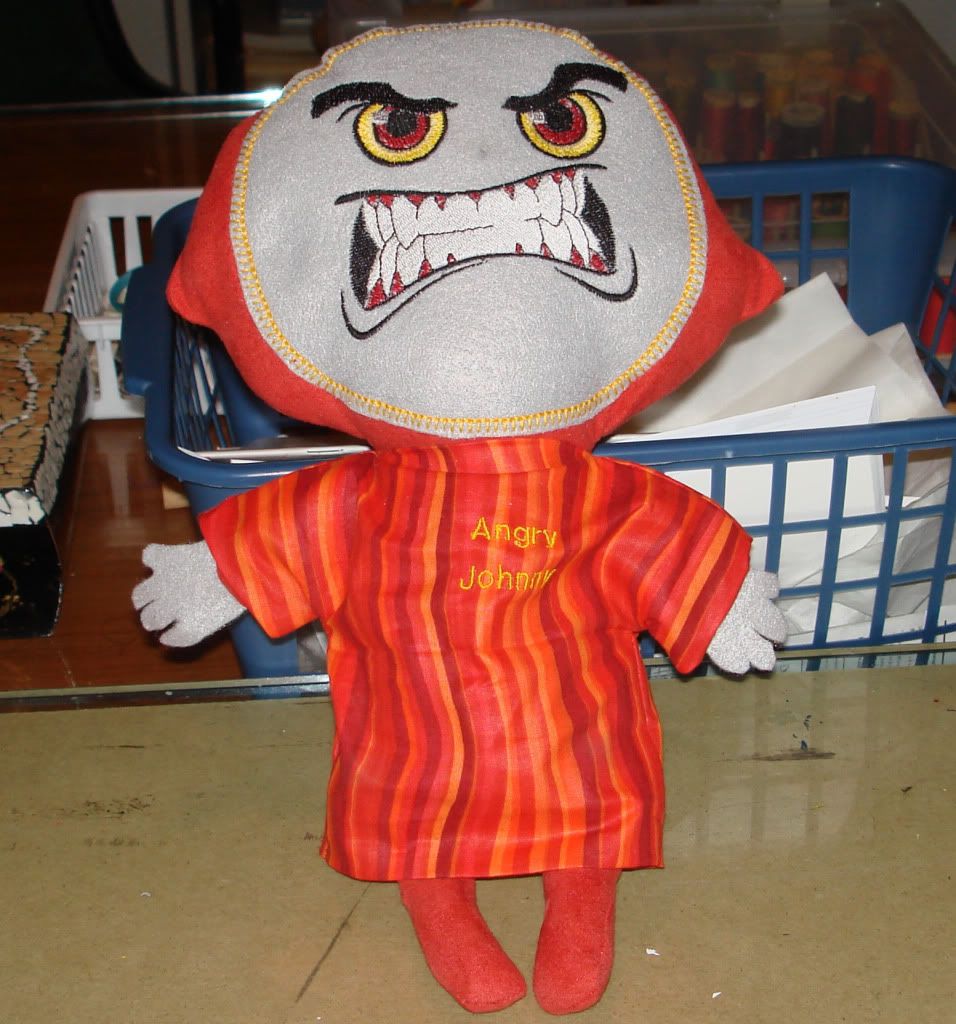
Angry Johnny
I used my Cricut Expression to cut one of the kids on the Playtime cartridge to use as a pattern. Once his face was finished I knew exactly what to call him so I embroidered his name on his shirt.
We already have several more finished and ready to go to the adorable little girl who gave this whole project special meaning.

Thursday, October 20, 2011
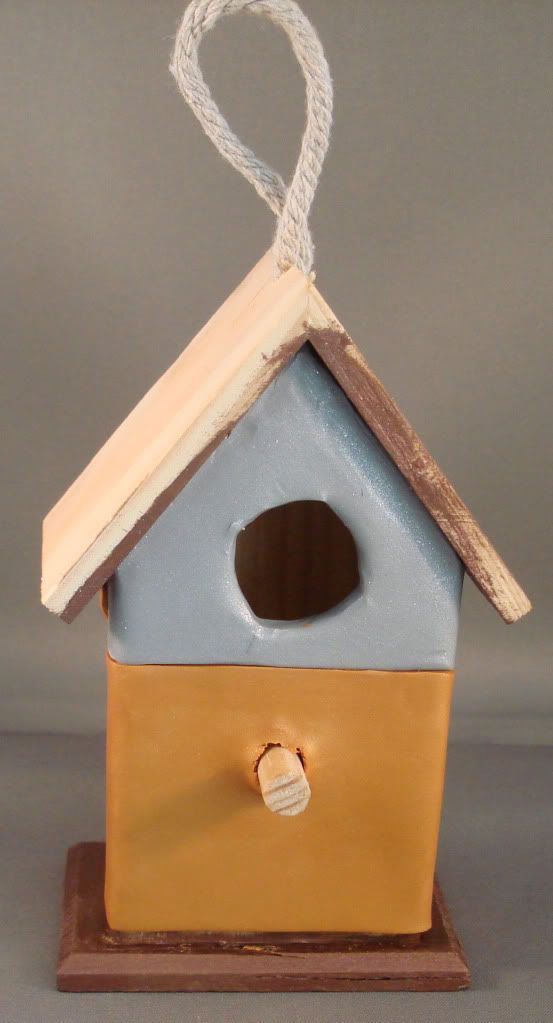
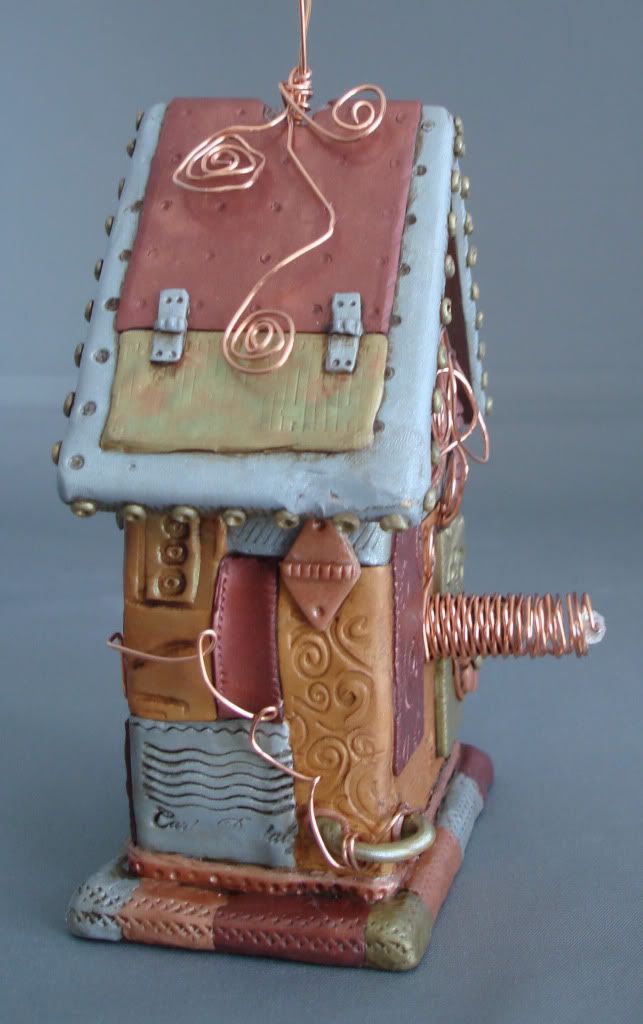
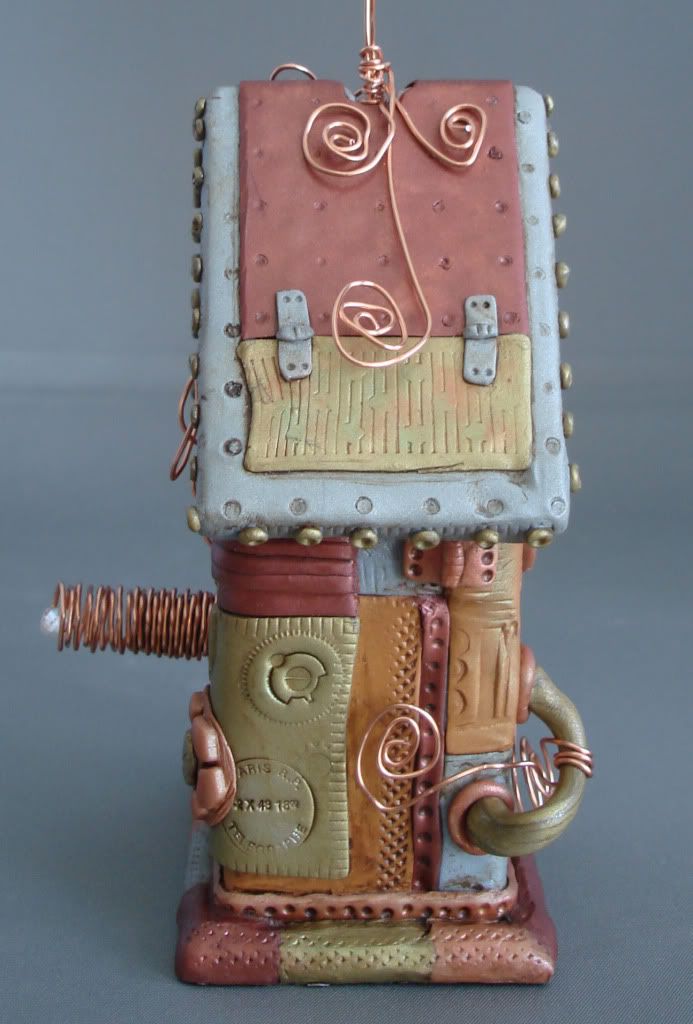
Scrap Metal Birdhouse

This is how it looked when I bought it for $1.
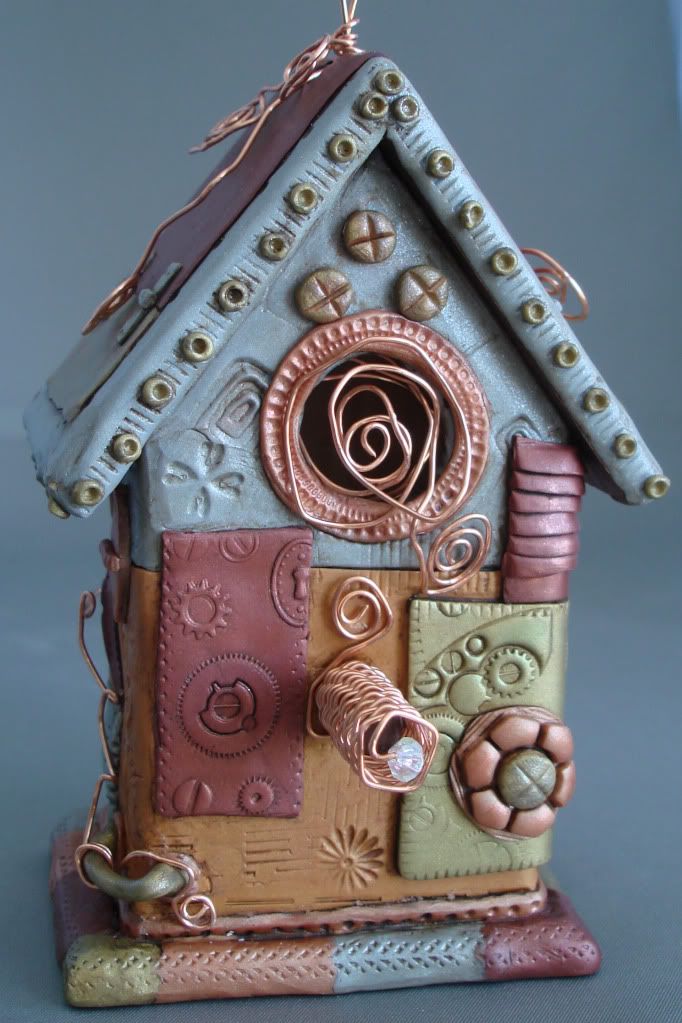
A little paint on the underside of the roof and then I started covering the whole thing with pieces of metallic clay. I used gold, antique gold, silver, brass and copper.
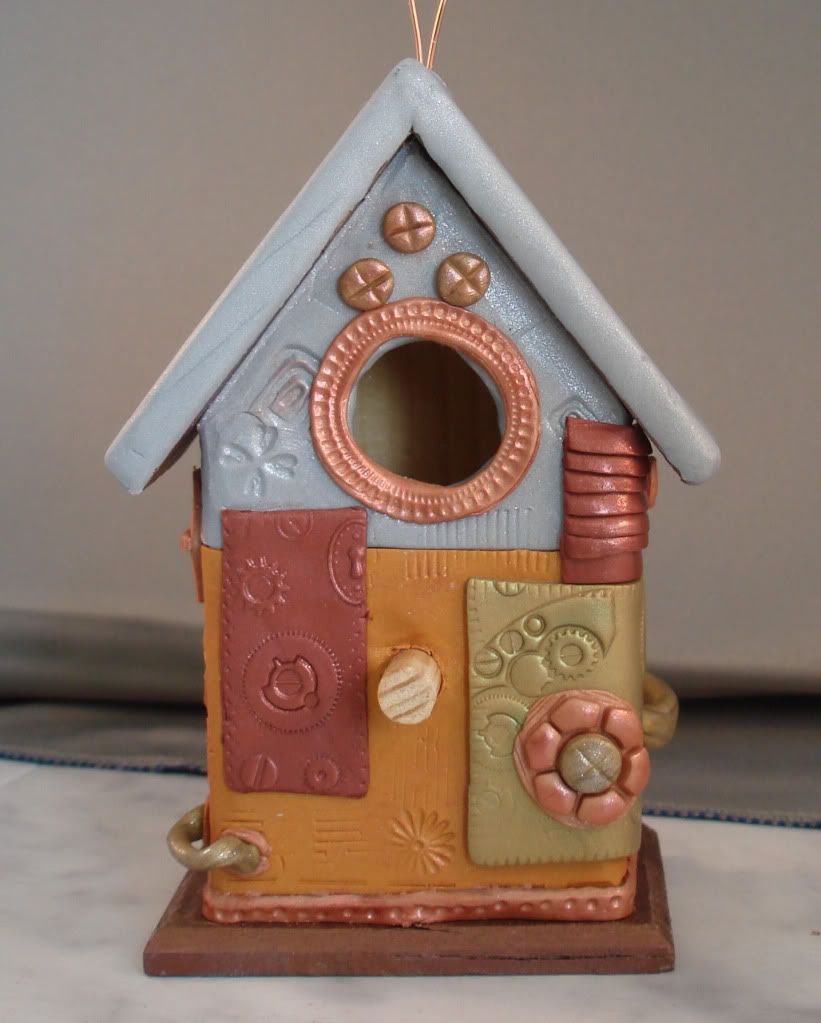
All kinds of things got pressed into the clay to give it some texture and make it interesting. I also swapped out that cord for some copper wire to hang it from.
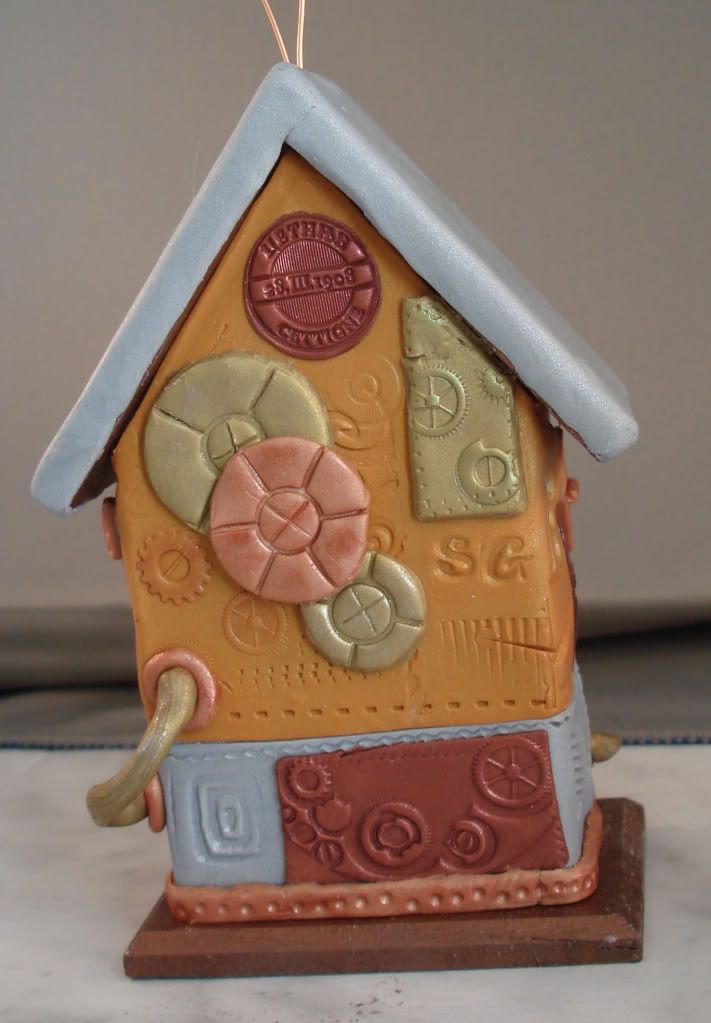
Multiple shades of PearlEx powders make the clay look more like metal and give the whole thing a nice shimmer that is very difficult to see in a picture.
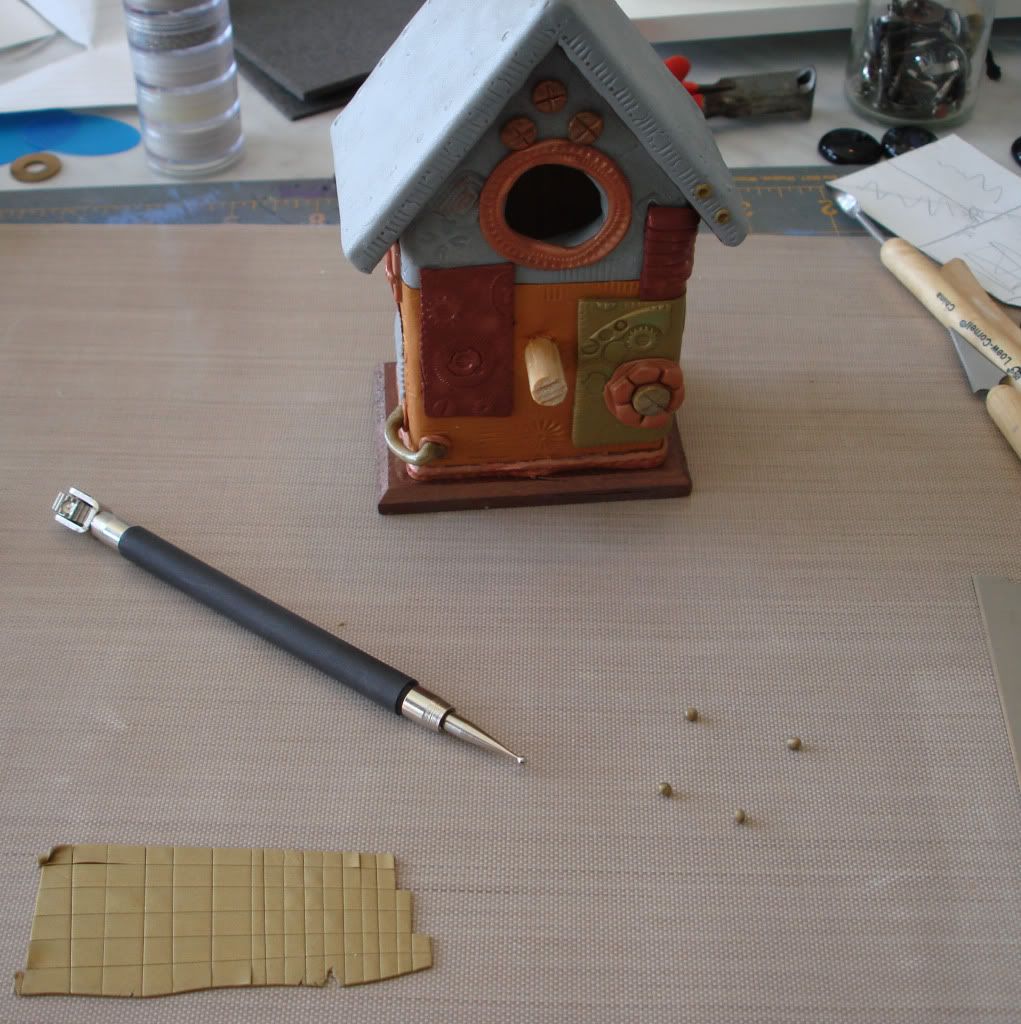
For the edges of the roof I rolled out a bunch of tiny pieces of clay and attached them with a little ball point tool.
The roof needed some more layers and then it needed to be texturized and PearlExed.
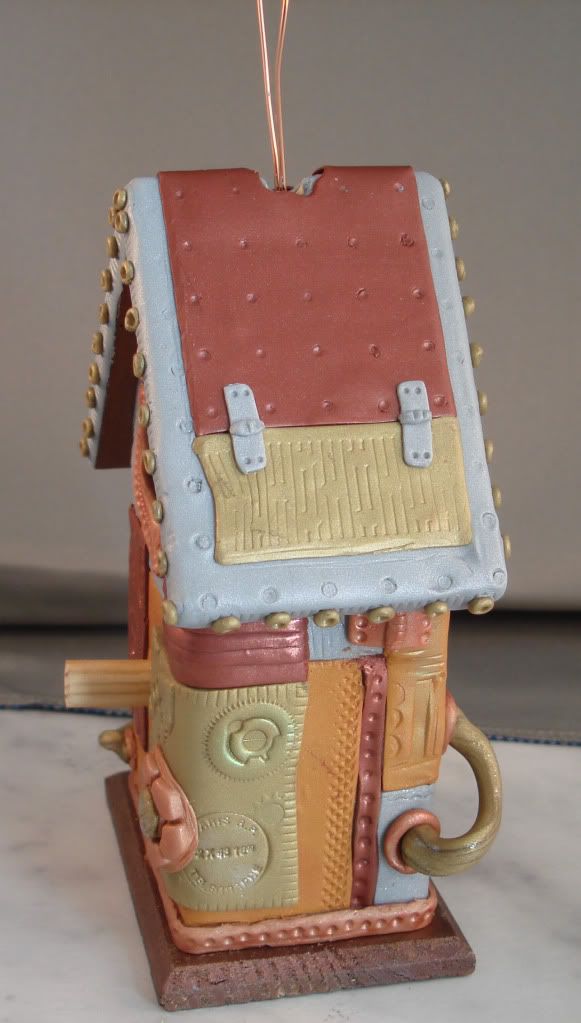
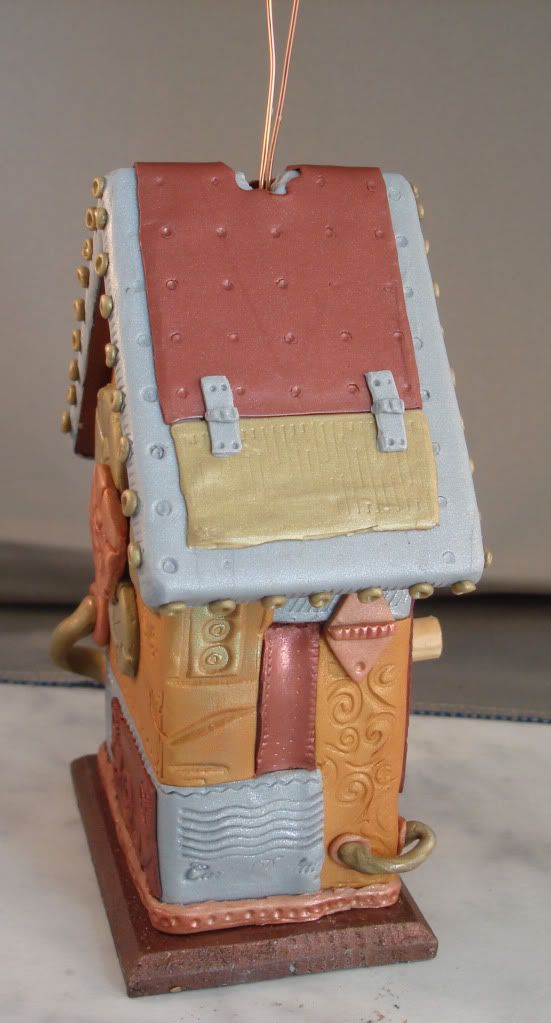
The other side.
At this point I was almost done adding clay. At the last minute I decided to do a patchwork around the base but once that was done and after everything was baked and cooled I gave it a wash of acrylic paint to make it look old and tarnished. A few twists of copper wire and one tiny crystal bead finished it off.

Tuesday, October 4, 2011
Halloween Stuff At The Dollar Store
It's my most favorite time of year again and the dollar stores are full of all things Halloween. Skulls and skeletons, eyeballs and other body parts... so many things to inspire gruesome morbid craftyness!
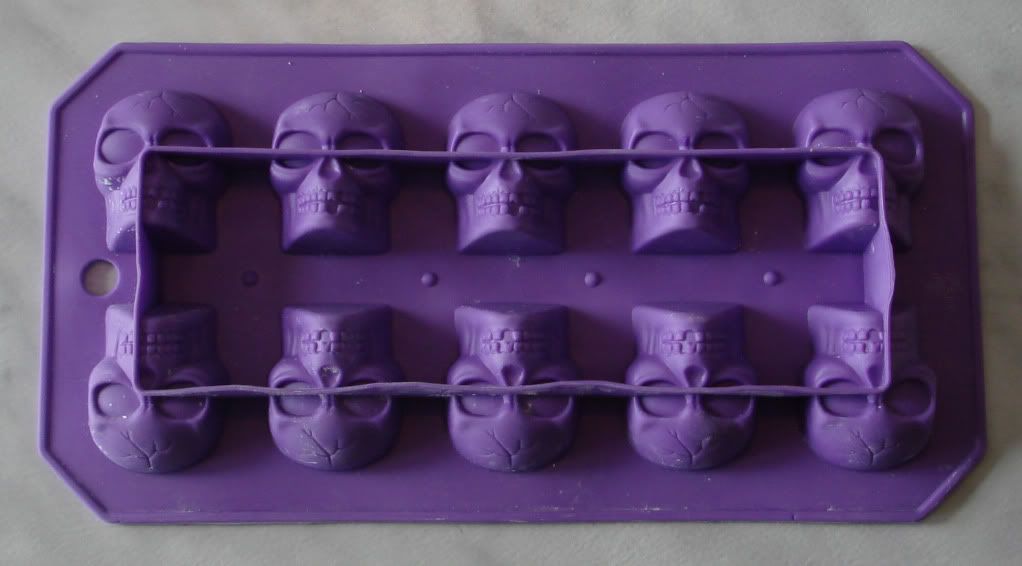
I found this flexible ice cube tray and knew right away that I could use it with clay. Now I have a way to make skull heads for dolls, fast and simple!

These are a couple of clay heads, baked and ready to go. I am impressed with the amount of detail these have!

I got right to work on a doll! I used a styrofoam cone as the body and twisted a couple pieces of wire together for the neck and arms. I glued a piece of scrap fabric around the styrofoam so it wouldn't shed all over the place while I worked on it.
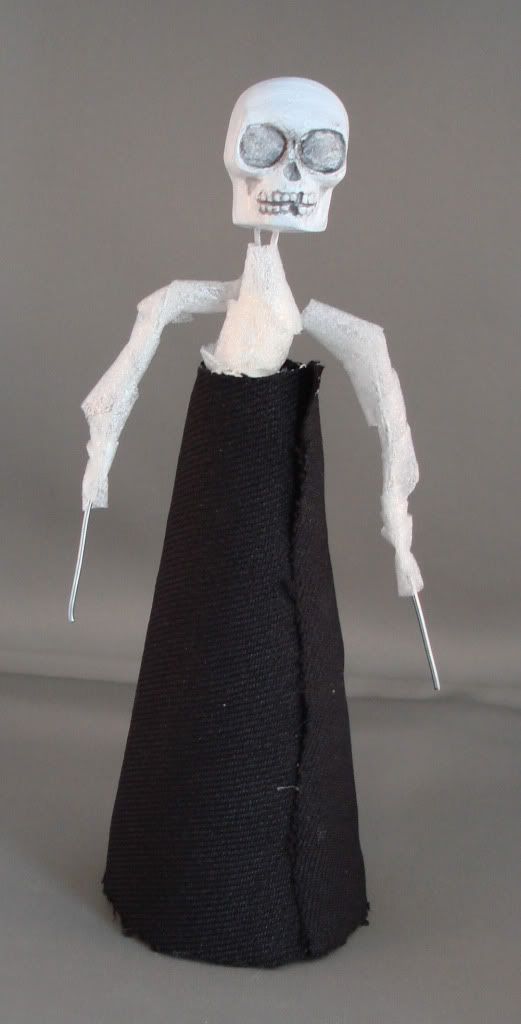
I used a little black paint to get into all the nooks and crannies of the skull and bring out the details in it. When it was dry, I glued the skull onto the wire neck and wrapped the arms in some scrap padding just to give them a little dimension.
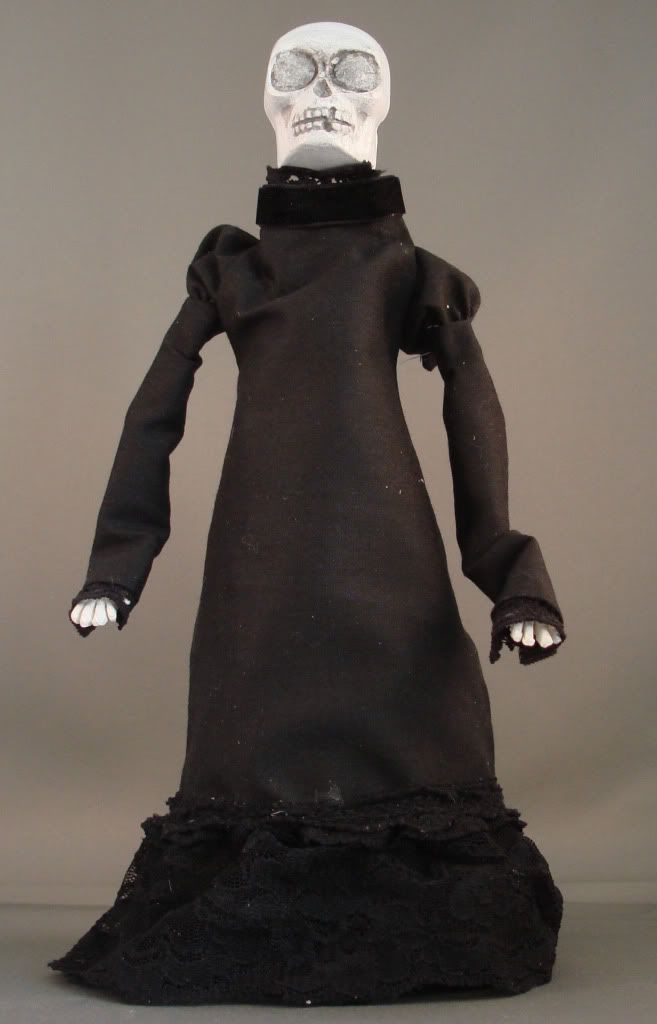
I cut a few pieces of fabric for the dress and used scraps of lace and trim to fancy it up a little.
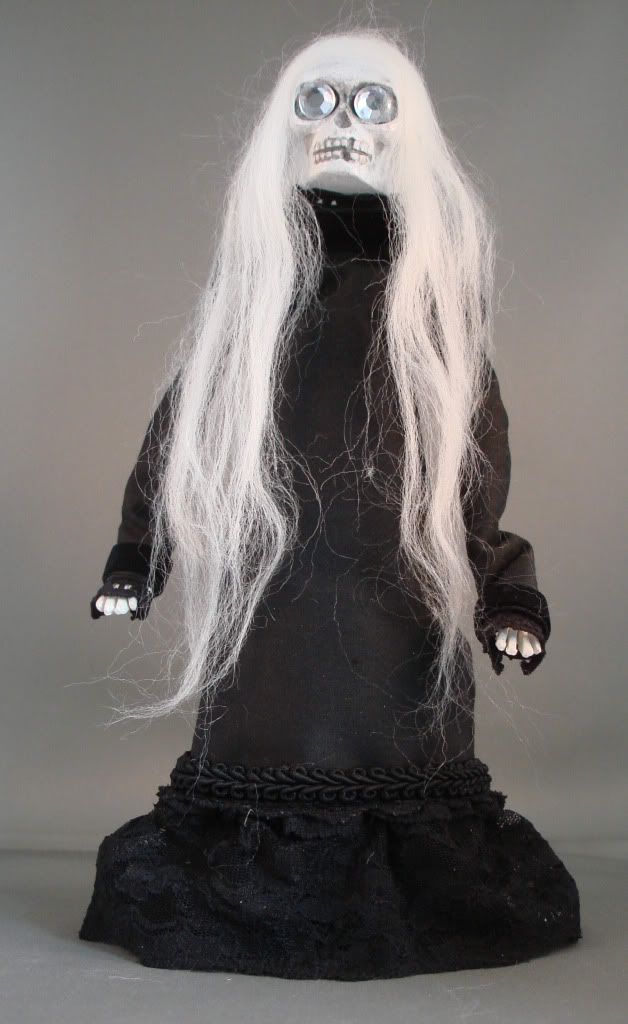
I glued on some loose wool roving as hair and a couple of rhinestones in her eye sockets. I almost left her like this but I wanted her to be a bit more mysterious.
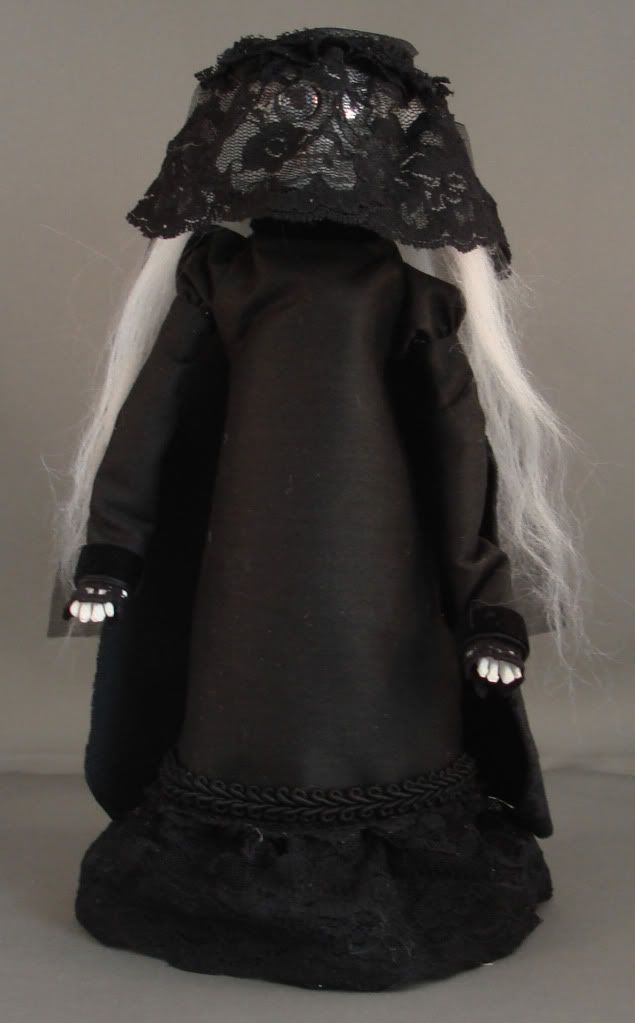
I think that the veil makes her look like she's going to her own funeral.
Wednesday, August 31, 2011
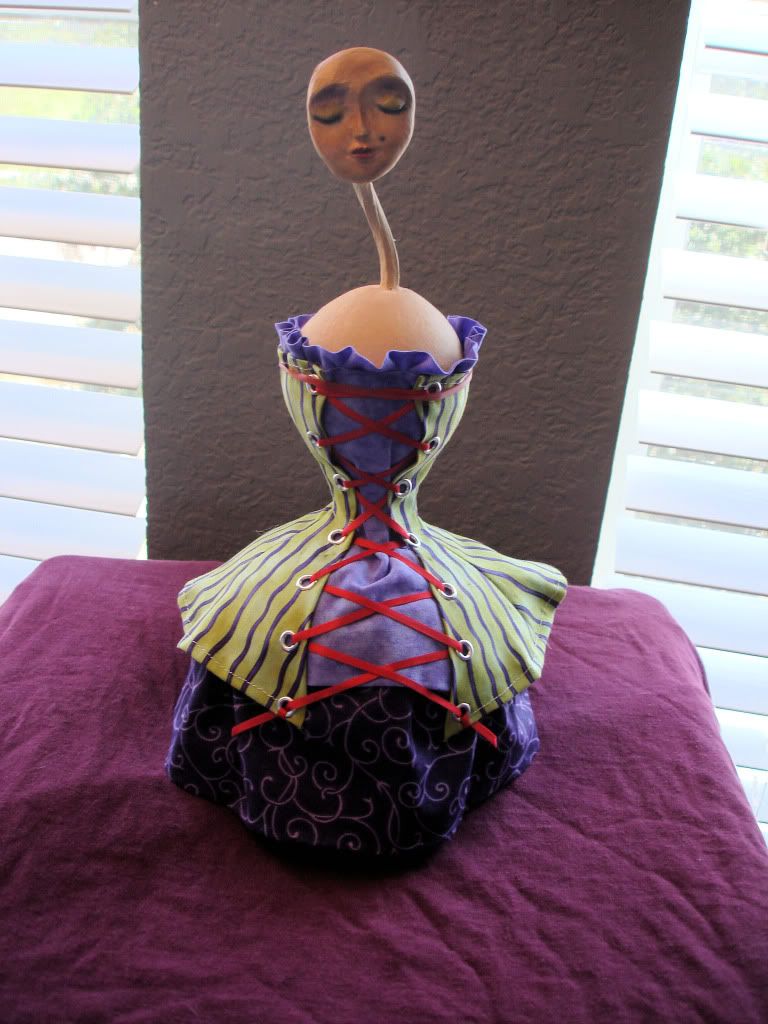
Madam le Corset de Gourd
A couple years ago my mom grew some birdhouse gourds. She dried them and set them aside and thought that someday she would make something with them. She finally decided that she wanted to paint some of them so we gathered everything together and got to work. She went straight at it but I couldn't really get inspired or come up with any designs to paint. I just kept ogling the "figure" on the gourd I had choosen and imagining what it would look like all dressed up. I am not one to fight a good idea so I put away the paint and busted out the fabric instead.
Here is my gourd, primed and ready to be painted.
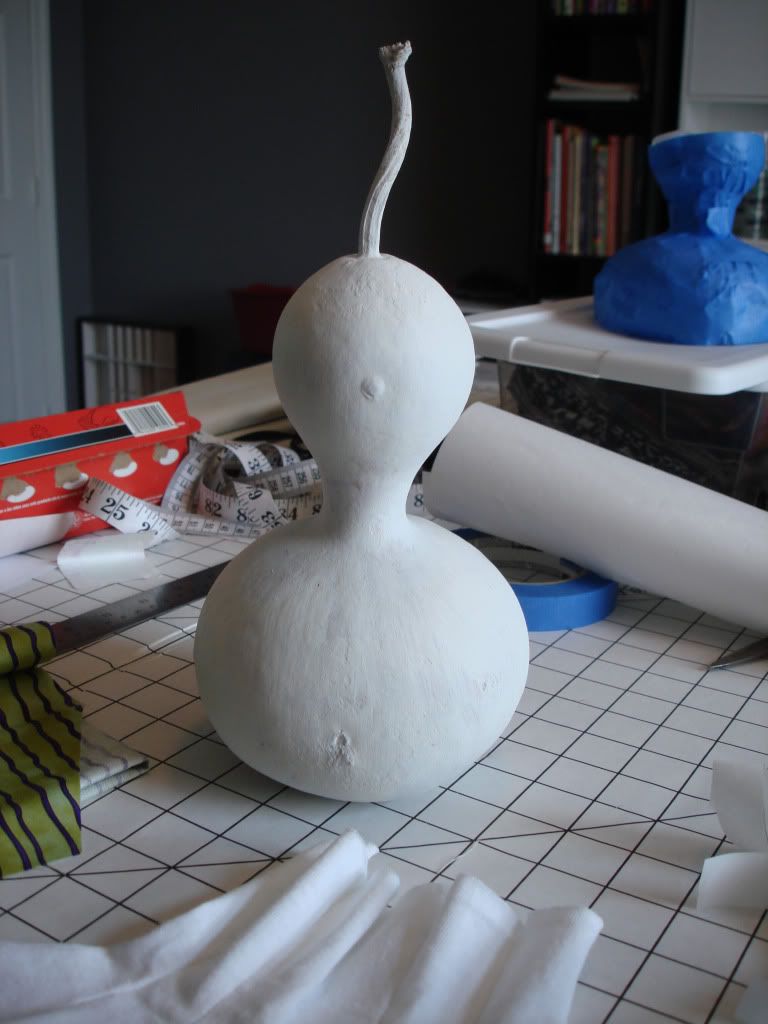
First I had to make a pattern and a test garment from some old tshirt material.
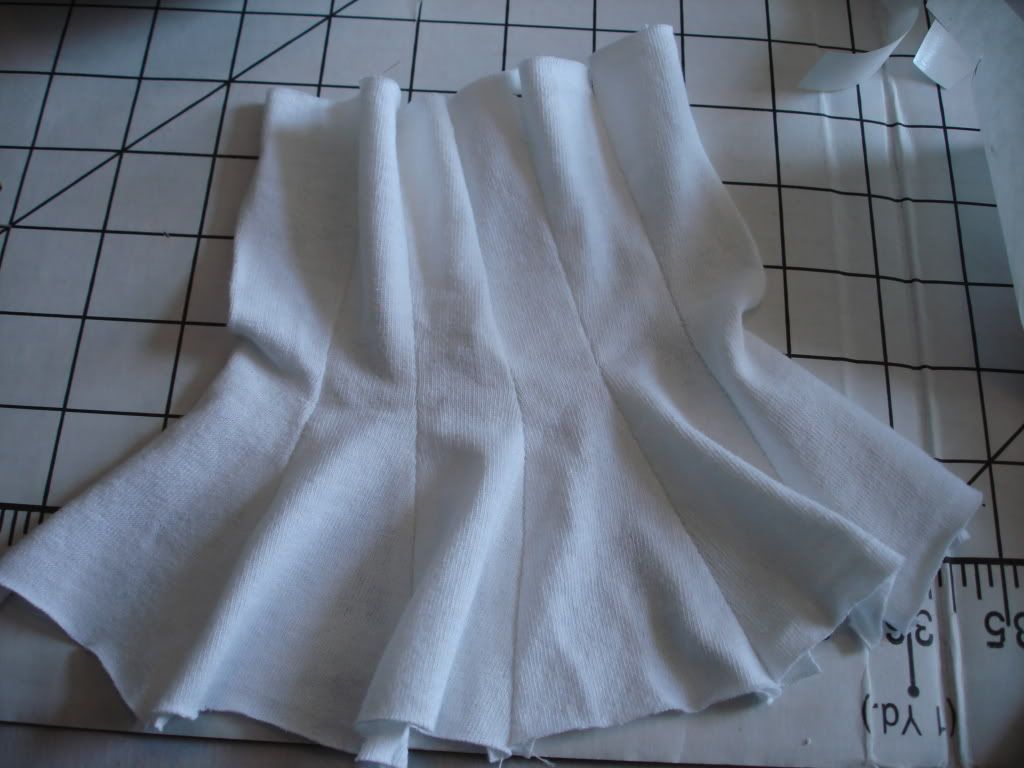
Starting out as a gourd and having that long stem (neck) meant that this doll would look whimsical and surreal without even trying so I choose to go in that direction with the fabric and embellishments.
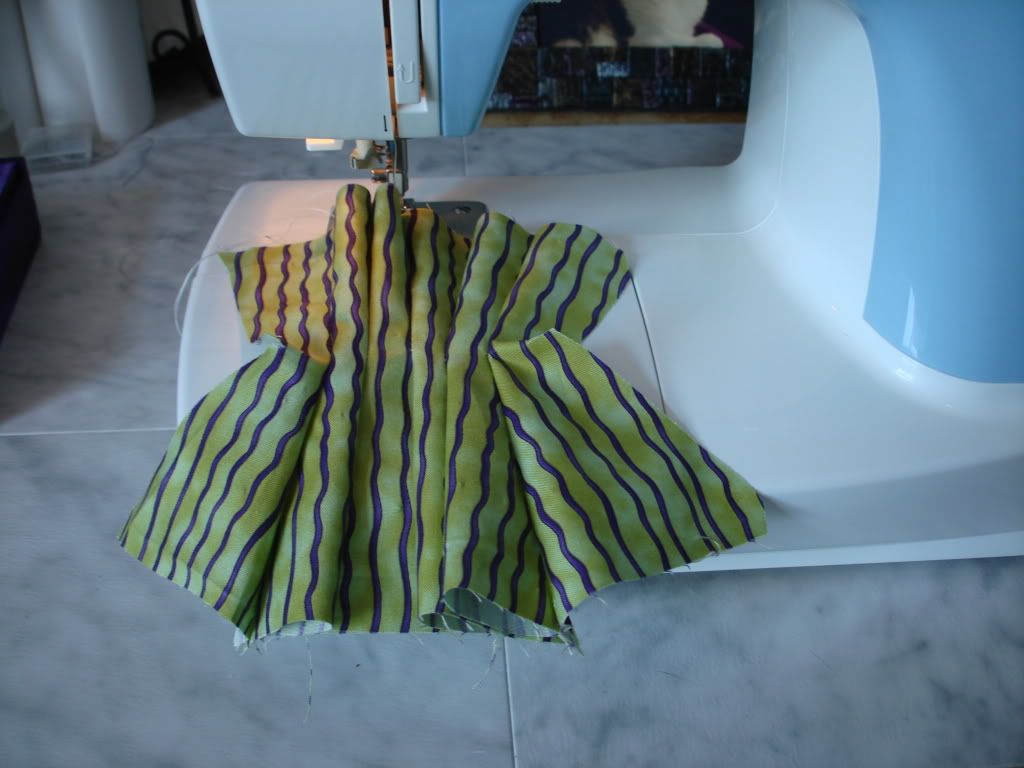
The corset was a little challenging so once I got it all sewn together I checked it for fit.
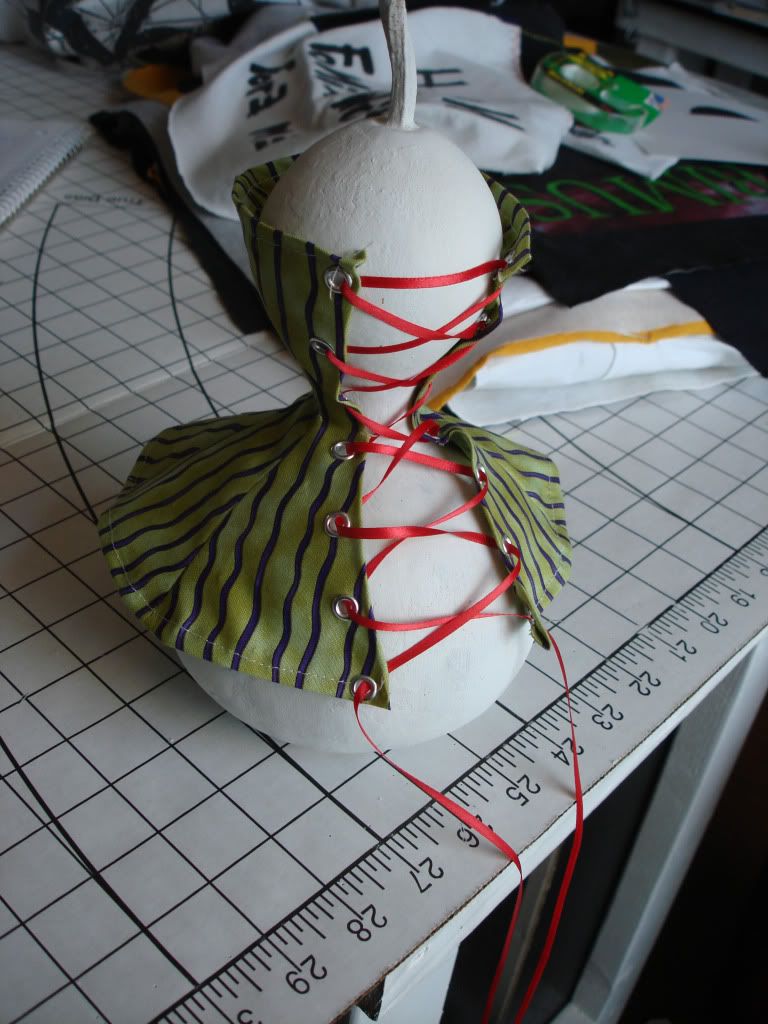
I wish now that I had not primed it, but oh well. I painted the exposed areas flesh tone and moved on. I cut a couple other pieces of fabric and made her some under garments and started layering it all together.
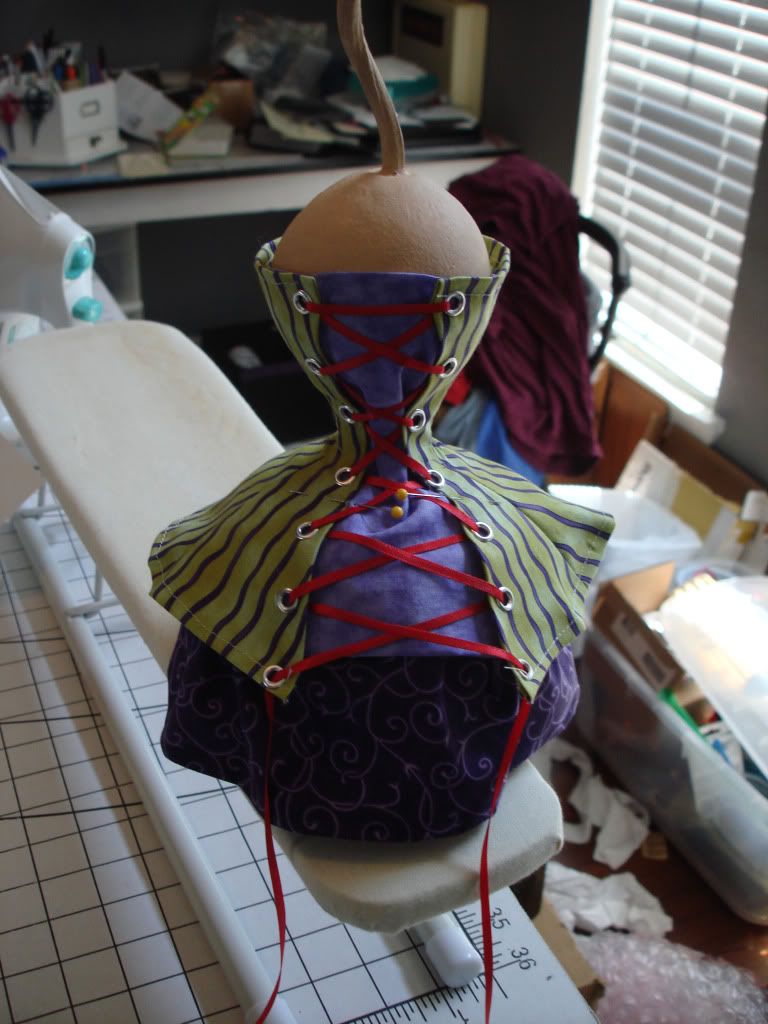
I made her a head from clay and painted her up with chalk and added a mole on her cheek.
Next came the hair.
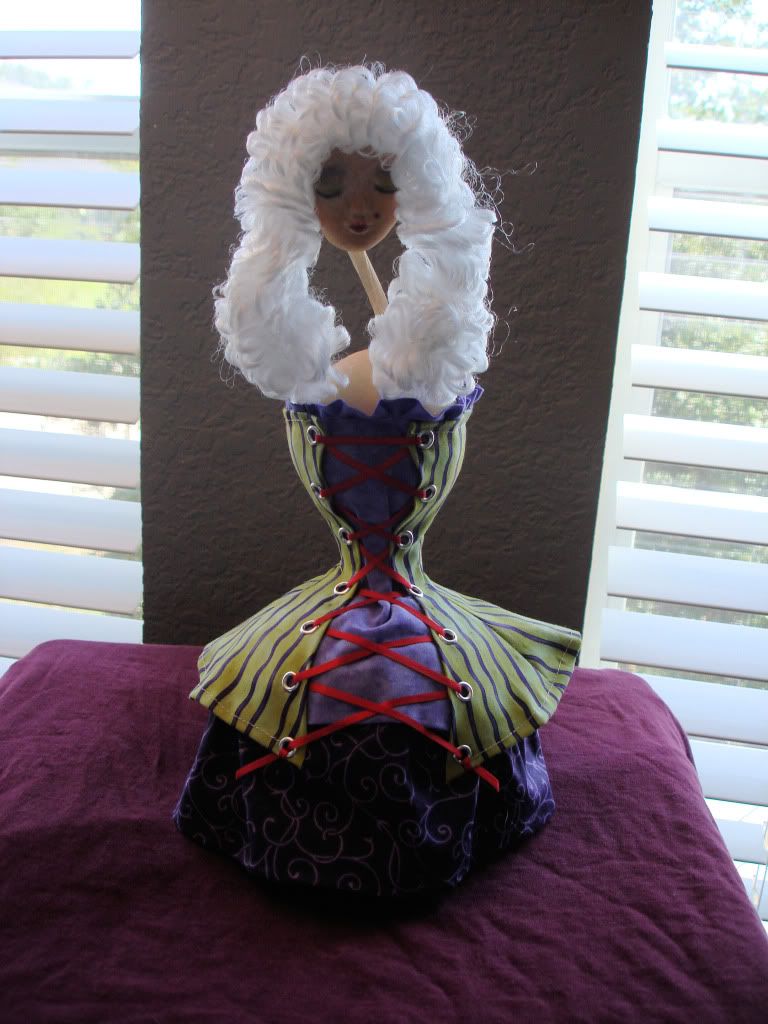
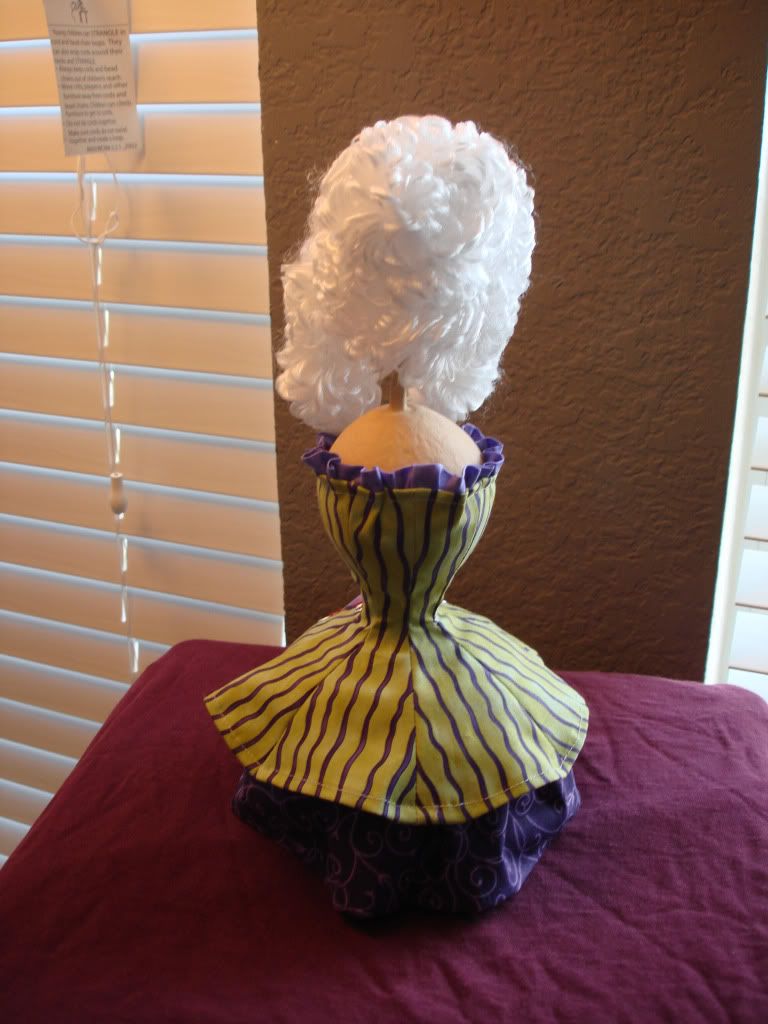
I had thought I was finished with her clothing but when I got to this point I did not like her back so I went rummaging through my stash and came up with some tulle that would work perfectly as a collar. Once I added that I figured she needed some jewelry and a hat.
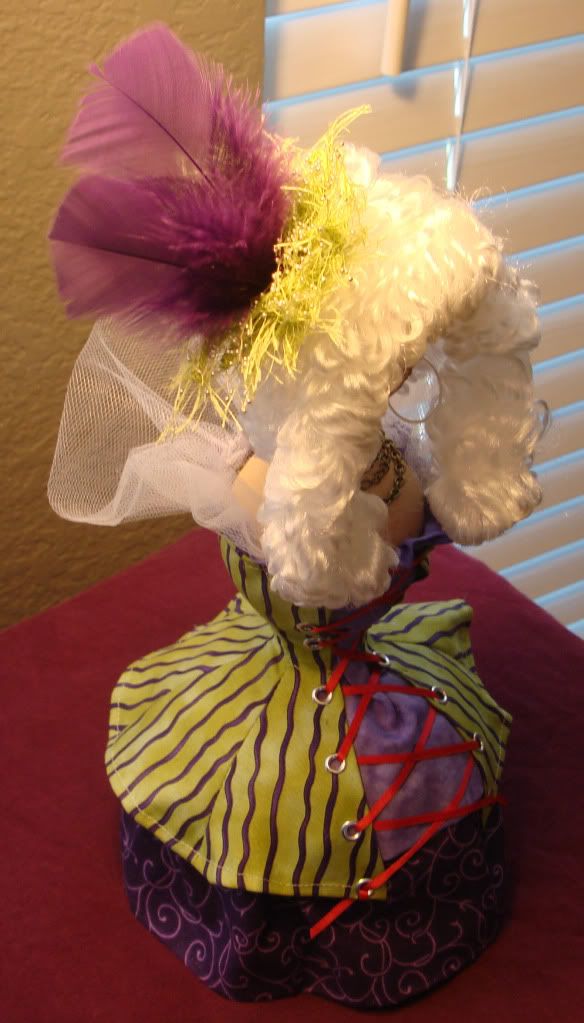
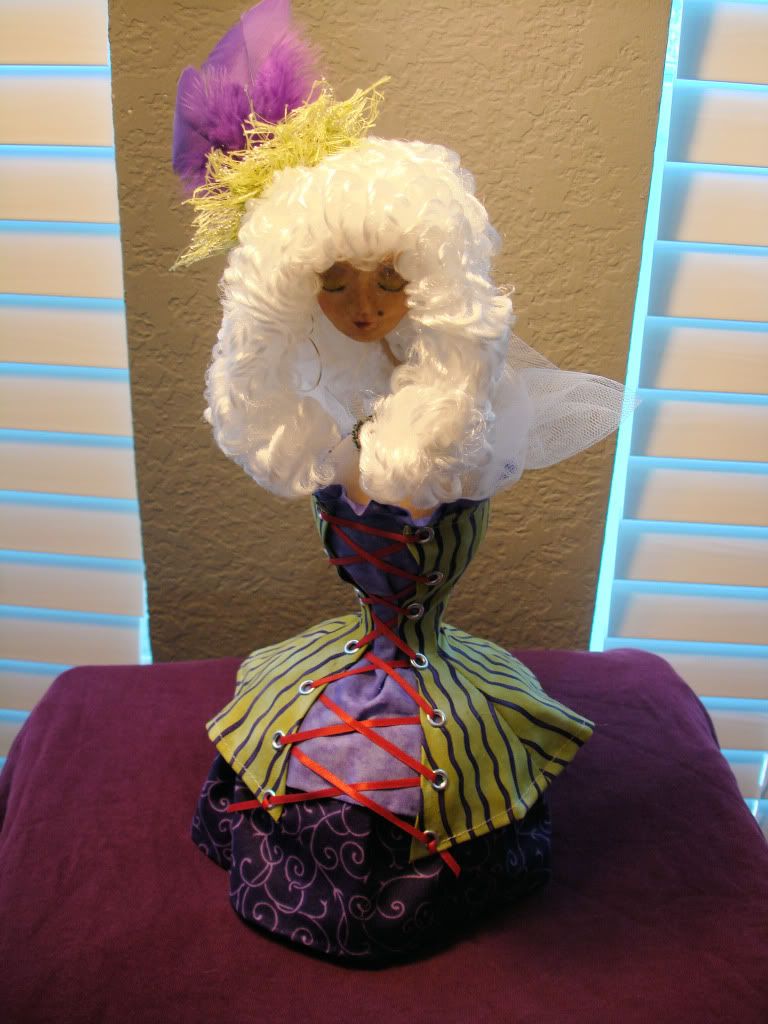
During this process I realized I had made up my own little piece of sexy medieval slang and that is where she gets her name. "To Corset The Gourd"

Friday, July 15, 2011
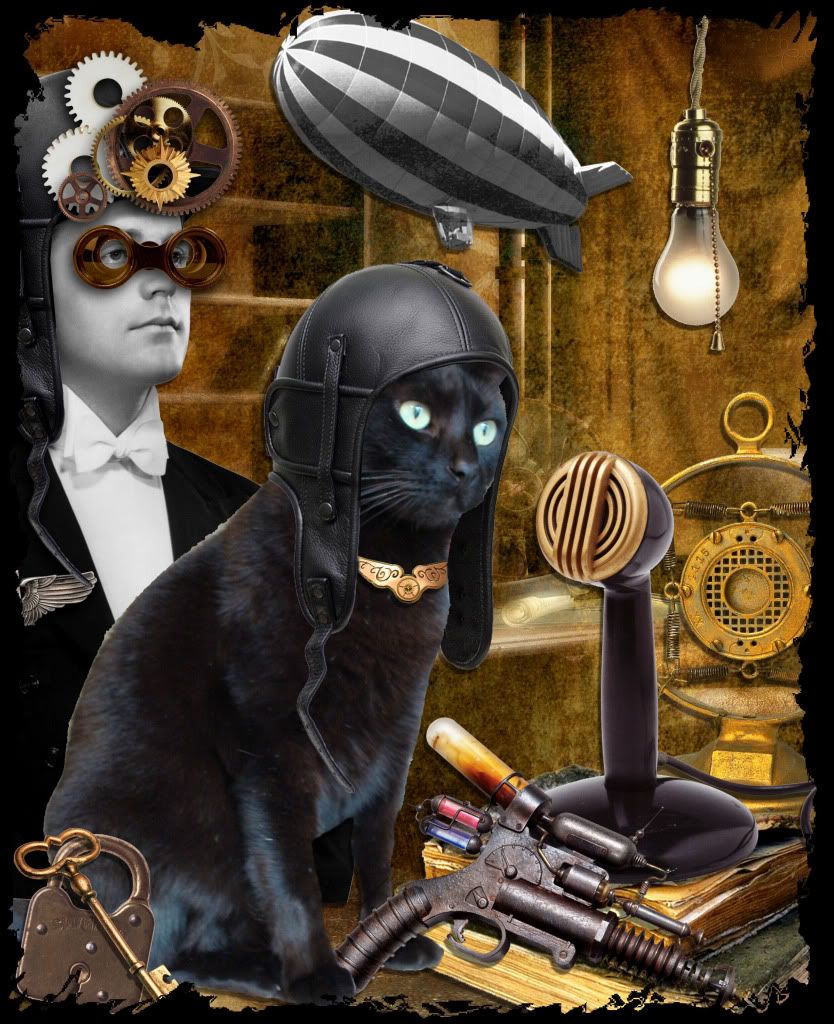
Post Surgery
I am finally up and about again and trying to get my mojo back. I still do not have full use of my hand so I am limited in what I can do, but making the best of it. One of the first things I was able to do was work on a digital collage. This is my cat Drake on his Big Adventure.
![]()
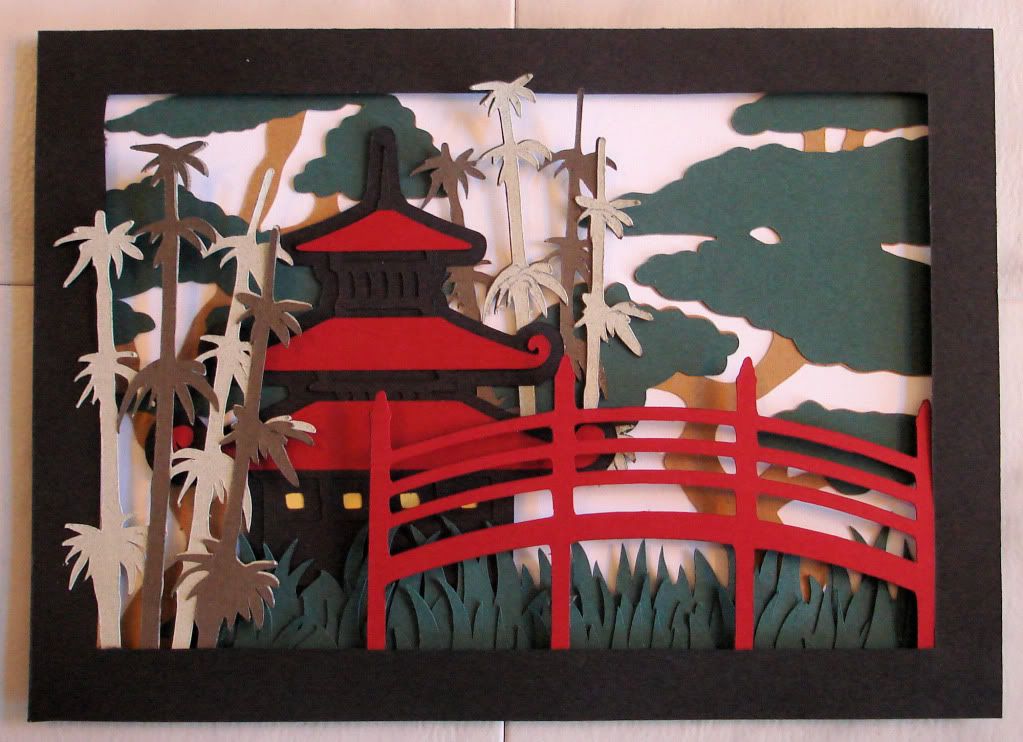
My new Cricut is something else I have been having a lot of fun with. It does intricate cuts on all kinds of materials. This first one is made entirely from paper and I inked over it for highlights and blending.
![]()
![]()
My new Cricut is something else I have been having a lot of fun with. It does intricate cuts on all kinds of materials. This first one is made entirely from paper and I inked over it for highlights and blending.
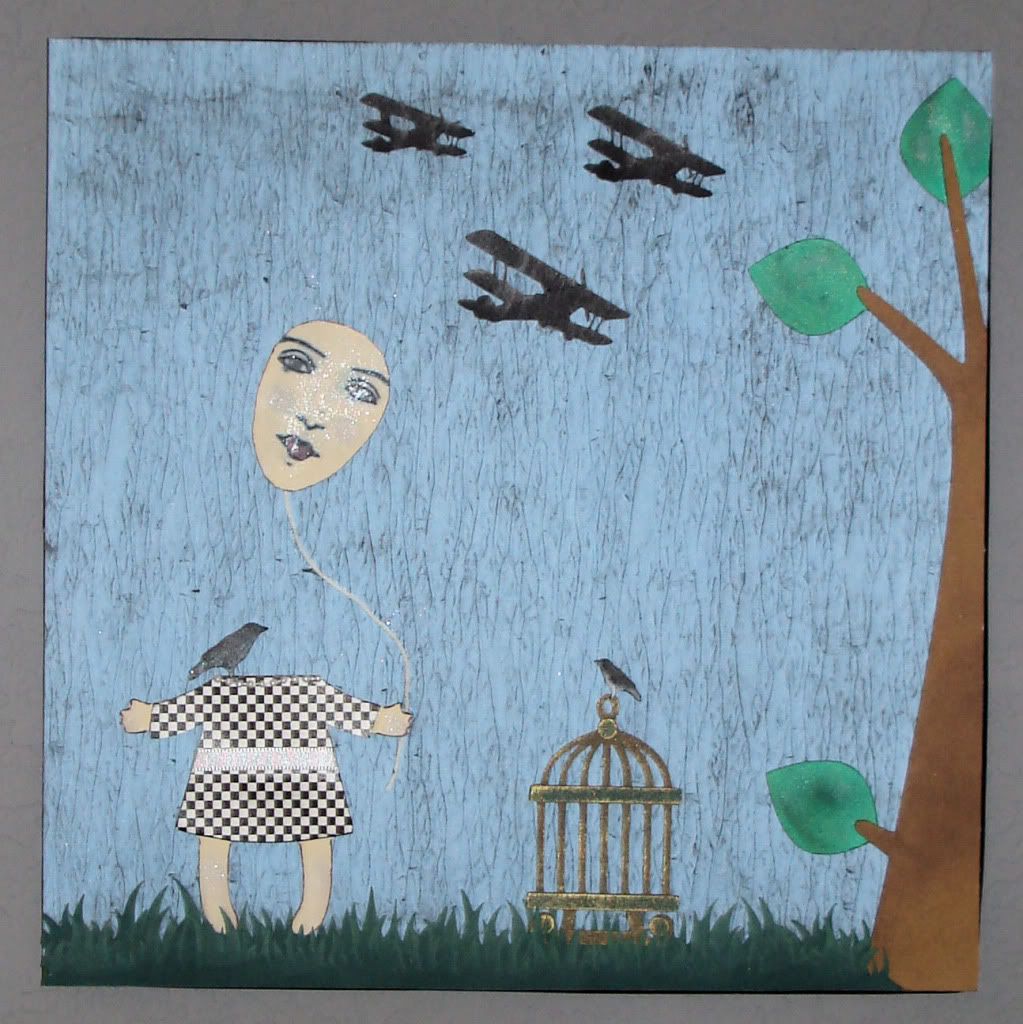
"The neighborhood is getting crow-ded"
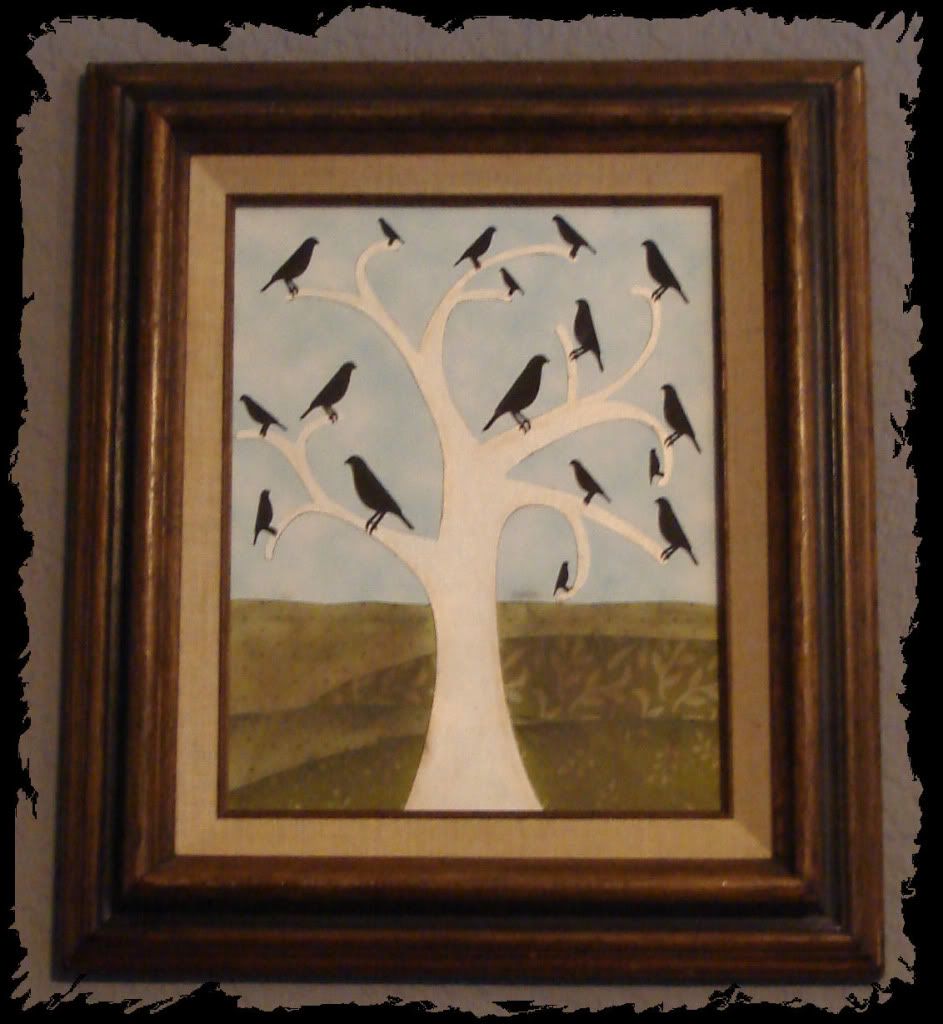
This is a patchwork collage made from 1" squares of patterened paper with paint and embossing done on an 8x10 wood plaque.

Friday, December 17, 2010
New Jewelry on Etsy
I returned to my love of jewelry recently and felt really inspired to make some new pieces. I added some of them to my shop on Etsy.


Subscribe to:
Posts (Atom)

