Showing posts with label clay. Show all posts

Thursday, October 20, 2011

Scrap Metal Birdhouse

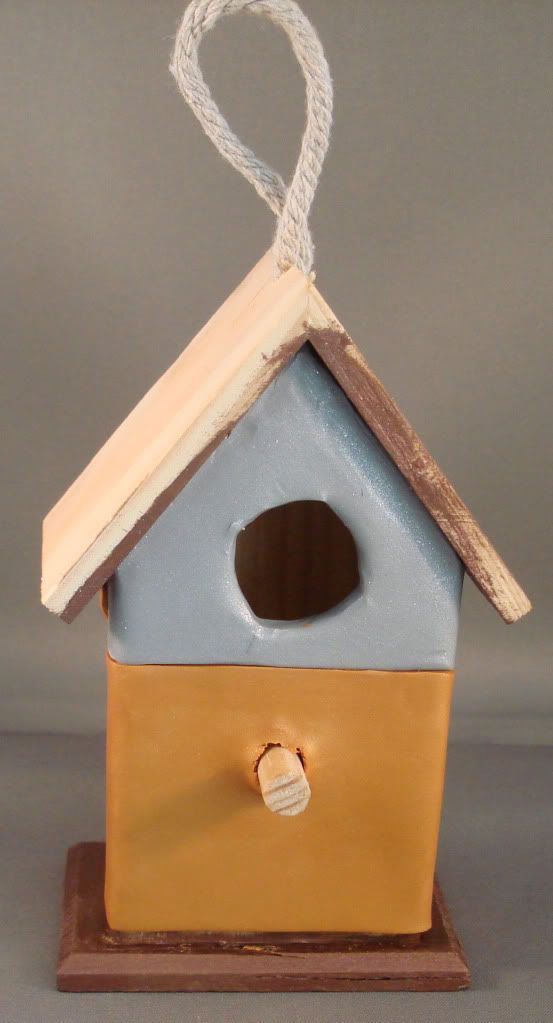
This is how it looked when I bought it for $1.

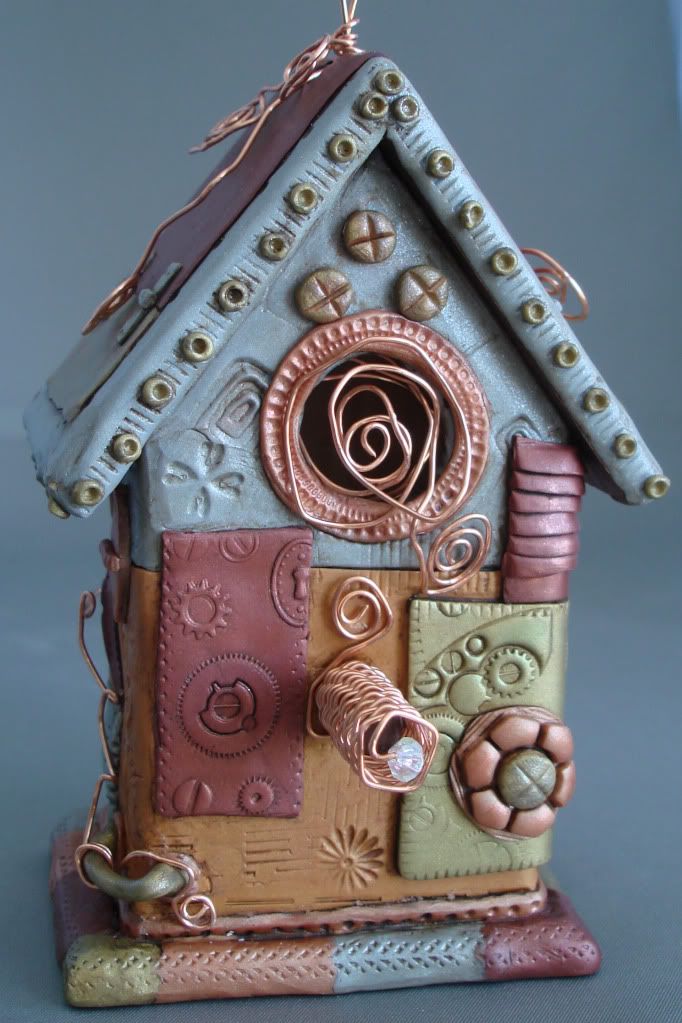
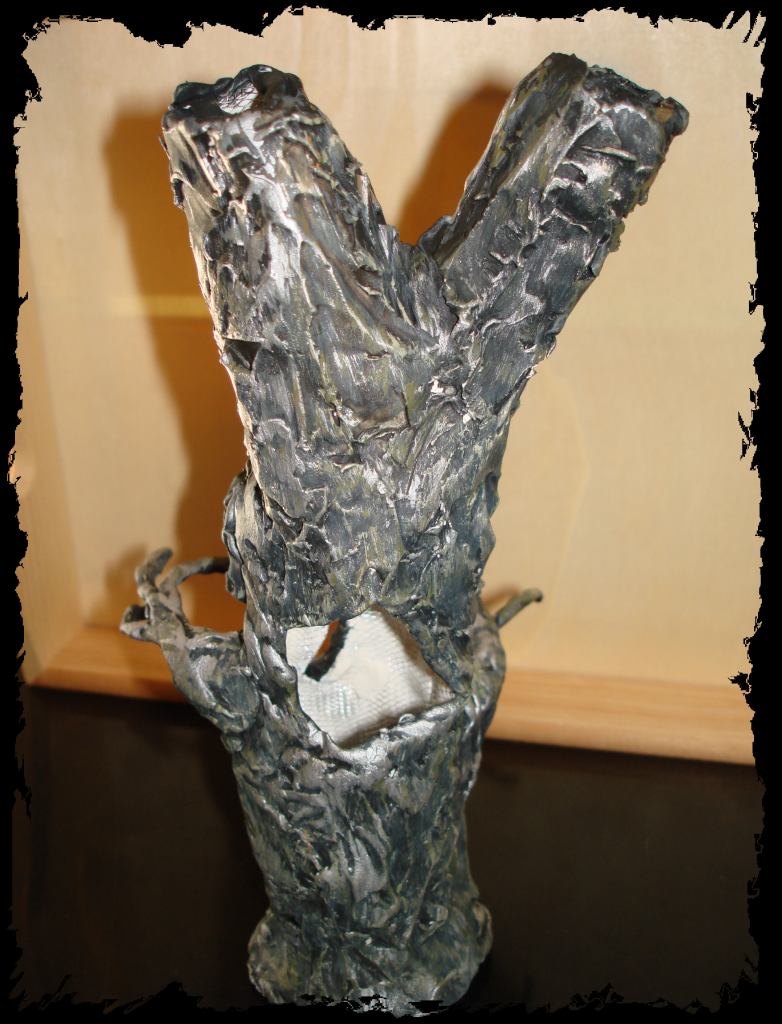
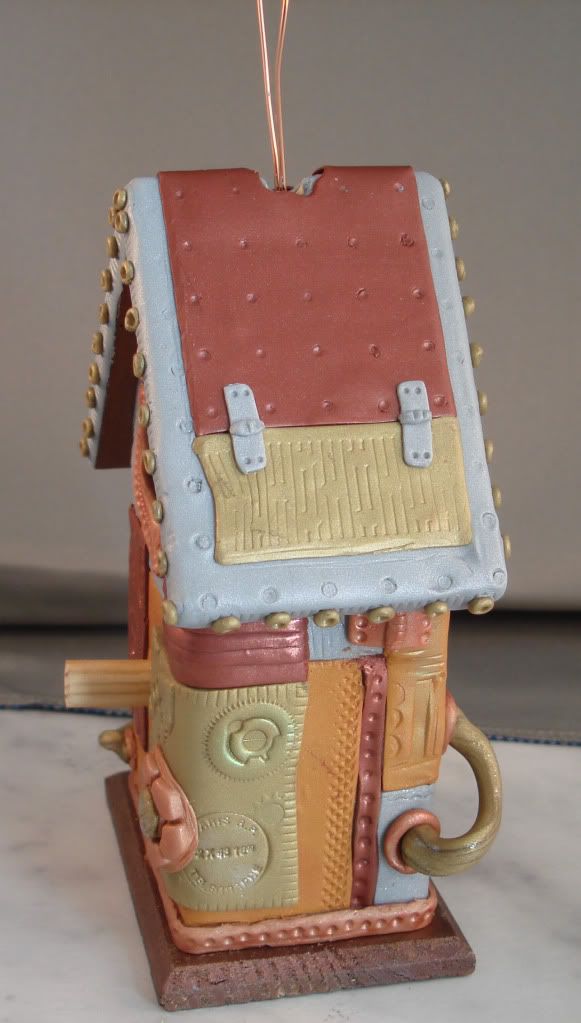
A little paint on the underside of the roof and then I started covering the whole thing with pieces of metallic clay. I used gold, antique gold, silver, brass and copper.

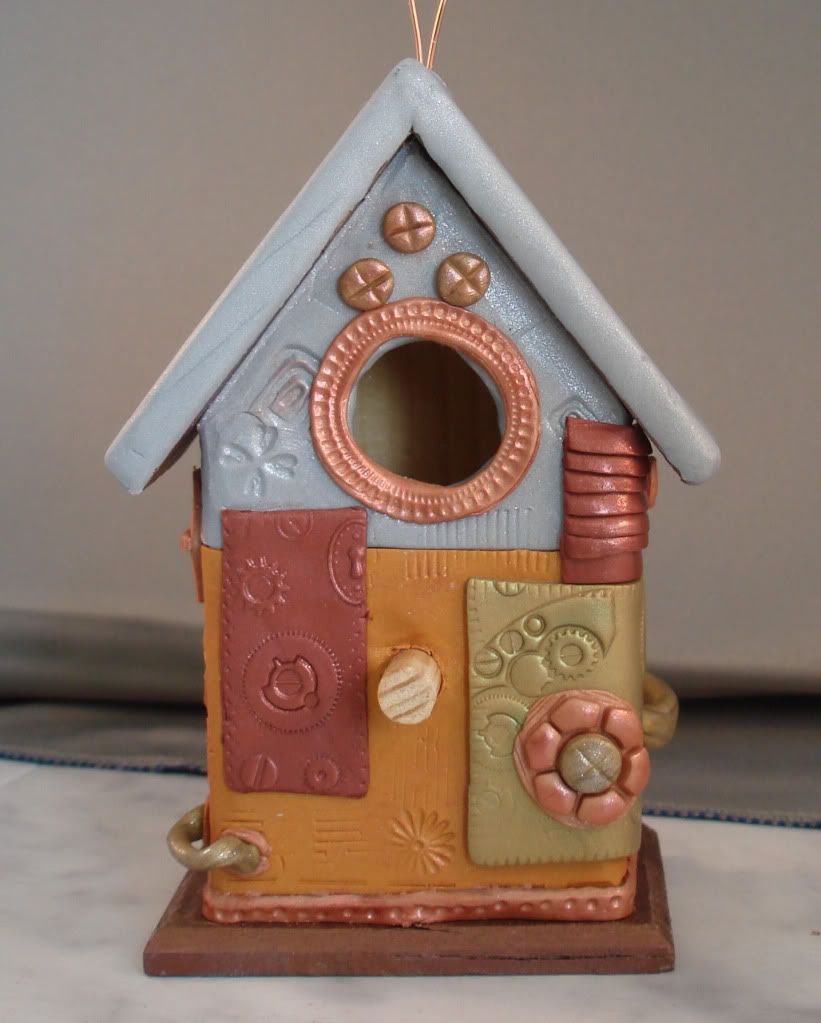
All kinds of things got pressed into the clay to give it some texture and make it interesting. I also swapped out that cord for some copper wire to hang it from.

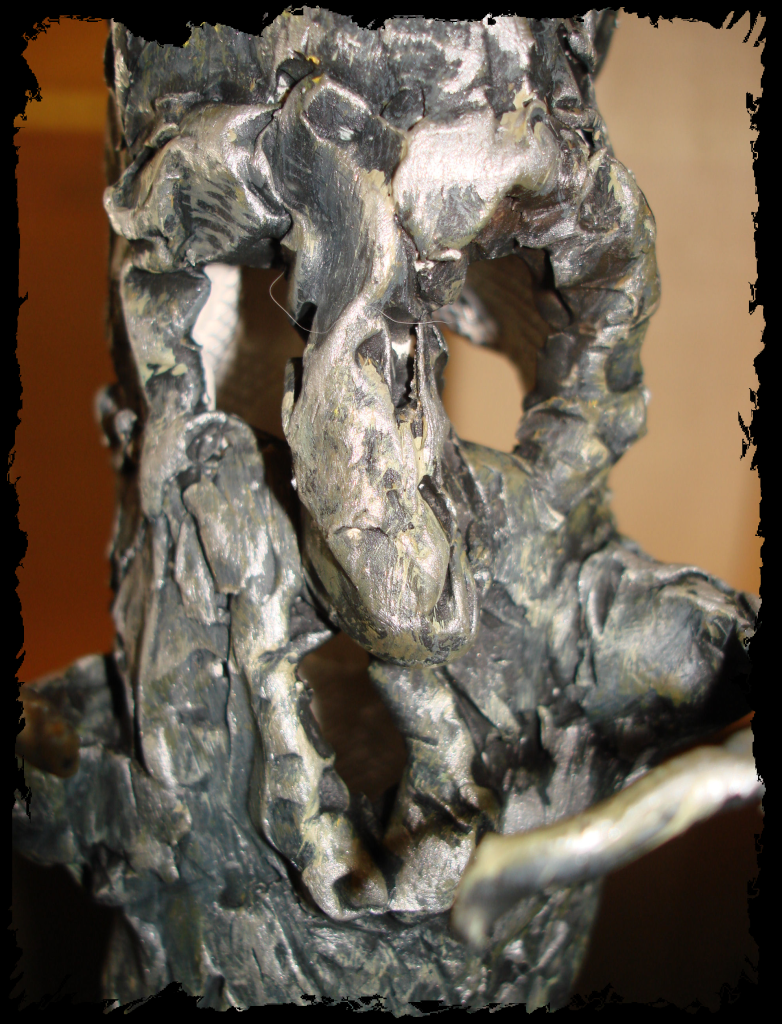
Multiple shades of PearlEx powders make the clay look more like metal and give the whole thing a nice shimmer that is very difficult to see in a picture.

For the edges of the roof I rolled out a bunch of tiny pieces of clay and attached them with a little ball point tool.

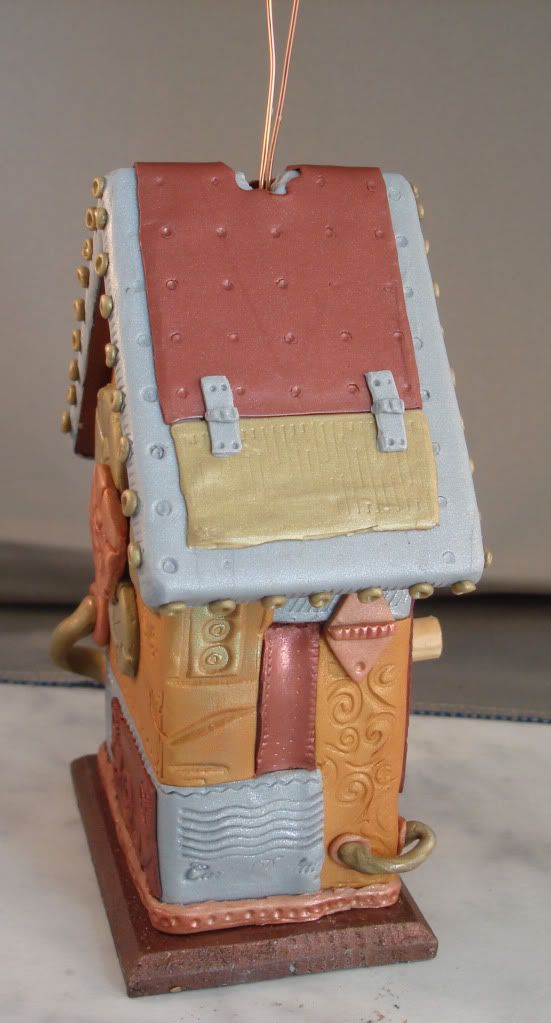
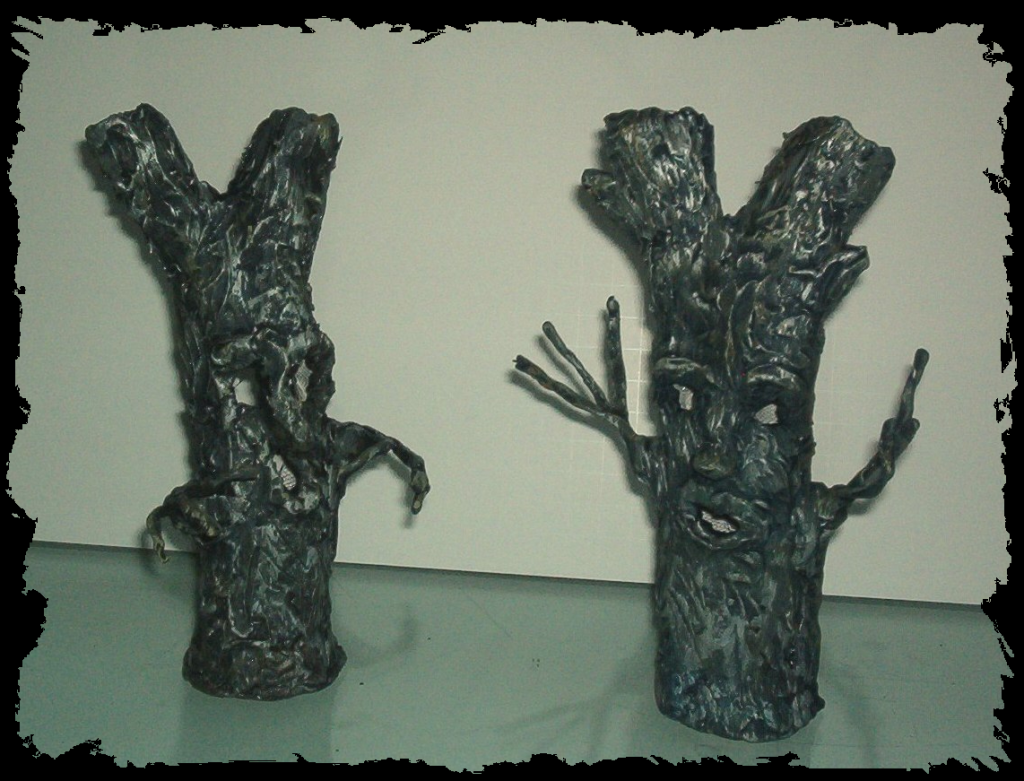
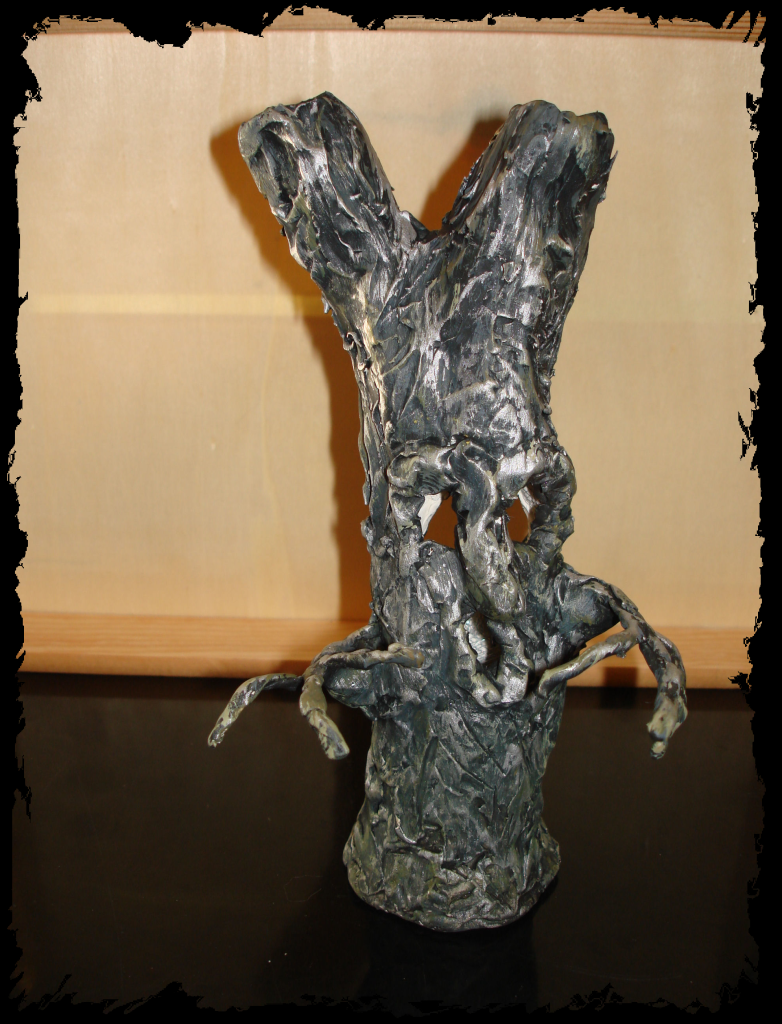
The roof needed some more layers and then it needed to be texturized and PearlExed.
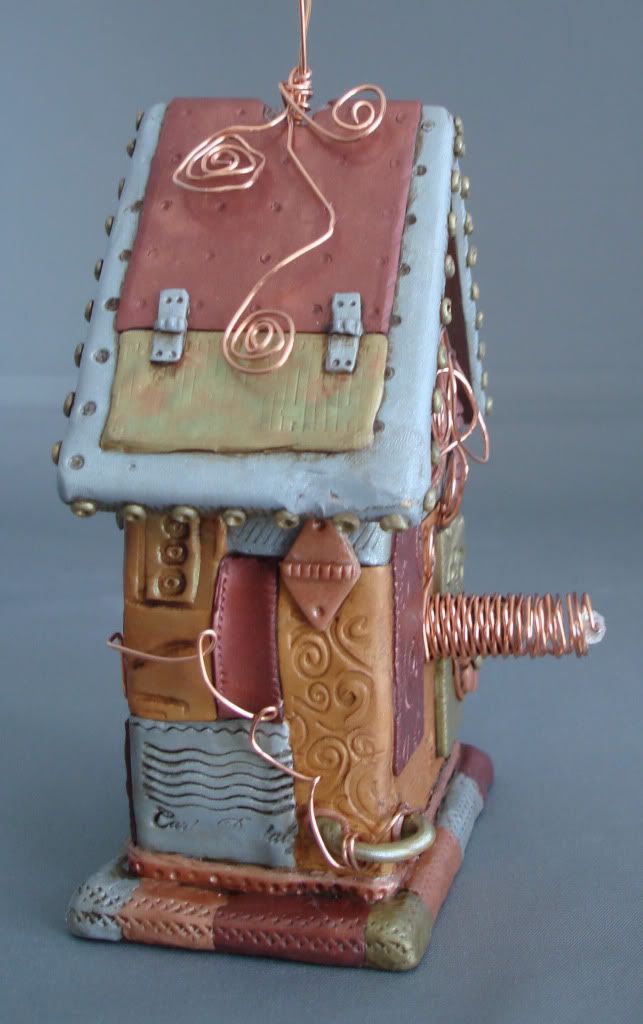
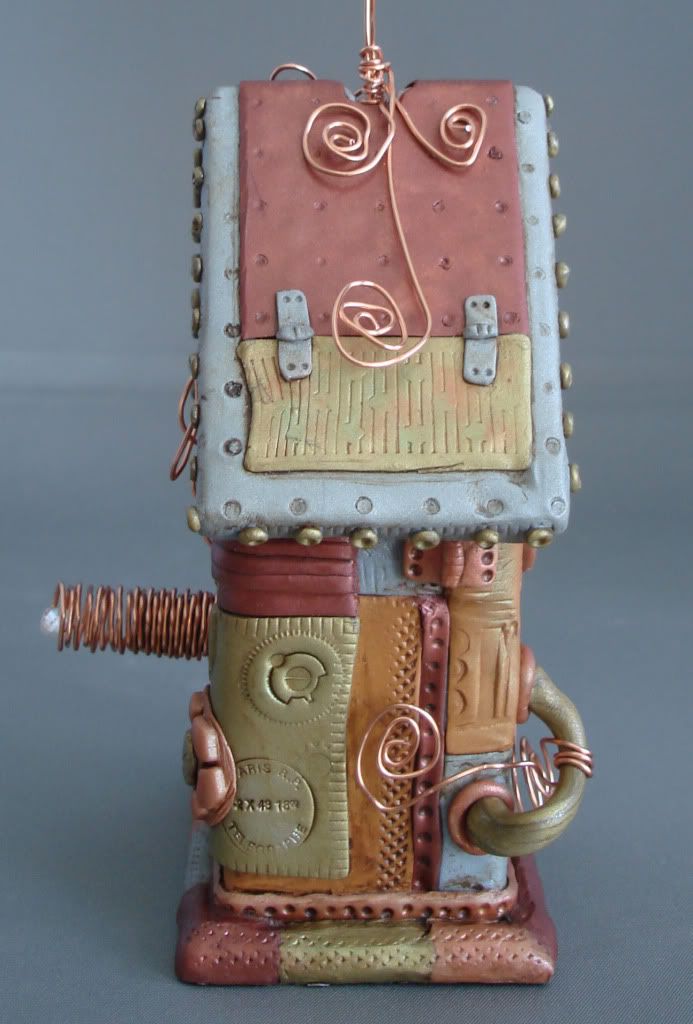
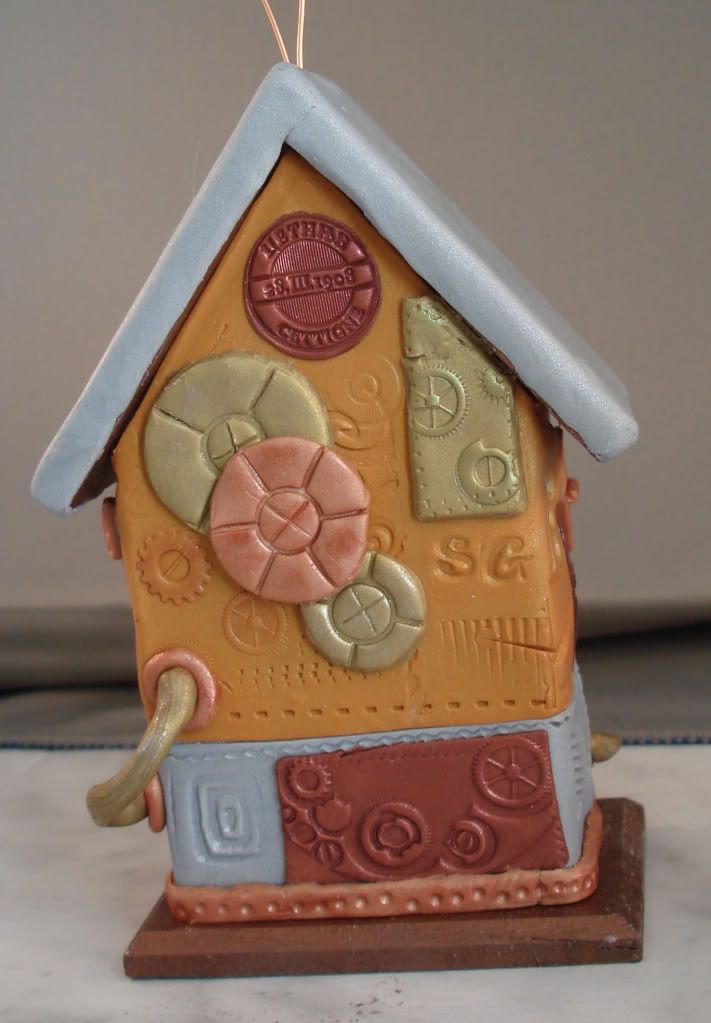
The other side.

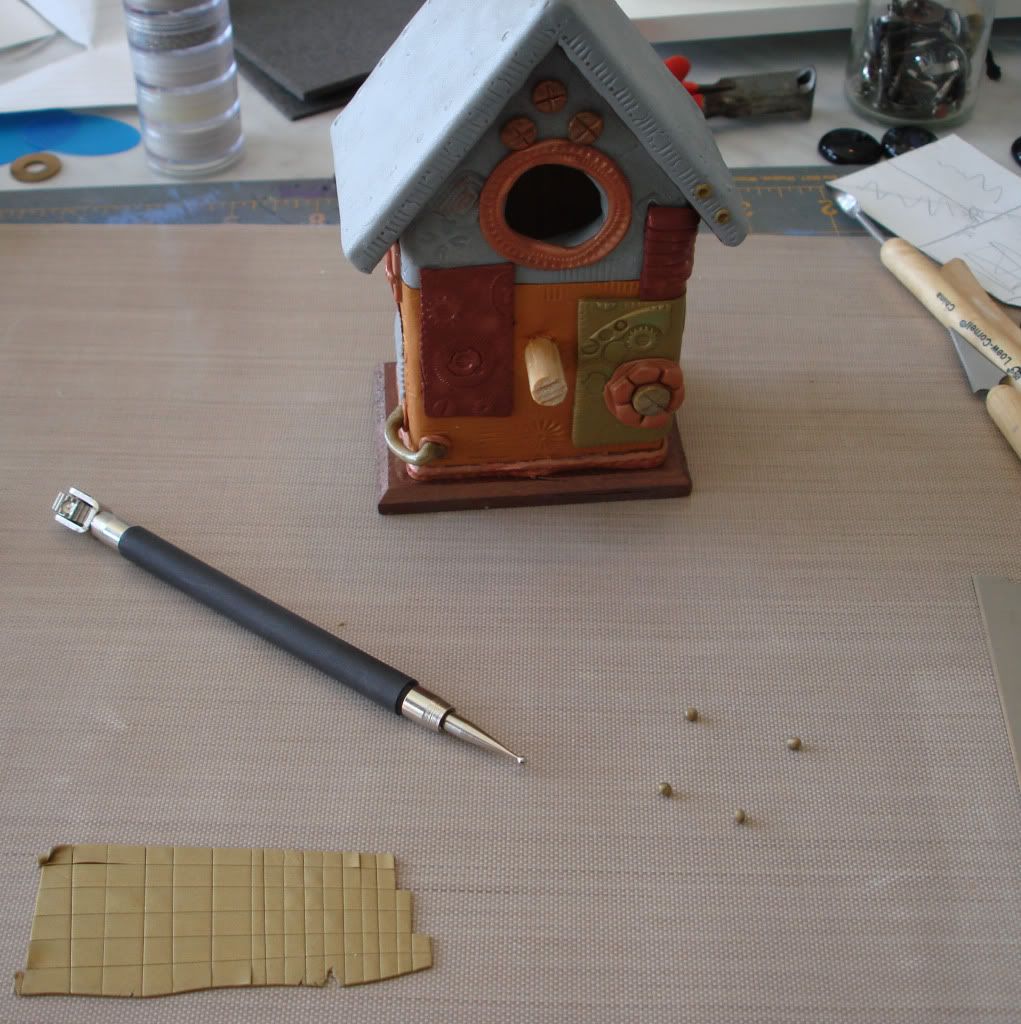
At this point I was almost done adding clay. At the last minute I decided to do a patchwork around the base but once that was done and after everything was baked and cooled I gave it a wash of acrylic paint to make it look old and tarnished. A few twists of copper wire and one tiny crystal bead finished it off.


Tuesday, October 4, 2011

Halloween Stuff At The Dollar Store

It's my most favorite time of year again and the dollar stores are full of all things Halloween. Skulls and skeletons, eyeballs and other body parts... so many things to inspire gruesome morbid craftyness!
I found this flexible ice cube tray and knew right away that I could use it with clay. Now I have a way to make skull heads for dolls, fast and simple!
These are a couple of clay heads, baked and ready to go. I am impressed with the amount of detail these have!
I got right to work on a doll! I used a styrofoam cone as the body and twisted a couple pieces of wire together for the neck and arms. I glued a piece of scrap fabric around the styrofoam so it wouldn't shed all over the place while I worked on it.
I used a little black paint to get into all the nooks and crannies of the skull and bring out the details in it. When it was dry, I glued the skull onto the wire neck and wrapped the arms in some scrap padding just to give them a little dimension.

I cut a few pieces of fabric for the dress and used scraps of lace and trim to fancy it up a little.

I glued on some loose wool roving as hair and a couple of rhinestones in her eye sockets. I almost left her like this but I wanted her to be a bit more mysterious.
I think that the veil makes her look like she's going to her own funeral.


Tuesday, June 22, 2010

Shrines

"Jack Of All Trades"

I have a bunch of containers of all different kinds and I decided I wanted to make some shrines. After looking through my collection I chose a couple miniature dollhouse china cabinets, an altoid tin and a few matchboxes. Only the altoid tin has been completed so far.

"Día de los Muertos"
(Day Of The Dead)

"Moonstruck"
Now that this one is painted I'm gathering things to put in it.

These matchbox shrines are covered in clay. Next step is to paint them!

Wednesday, May 12, 2010

Who Do That Voodoo That You Do Soooooo Well Part I

Here is Voodoo Mama!
I started working on her awhile back and my ideas kept building on themselves.

I started out by making an armature out of heavy gauge wire that would stand up by itself. I coated it thinly in clay, then went back and added the face, hands, feet and boobies! BIG boobies!

A little paint and she is starting to look like somebody so now I need to get her dressed!

Her underwear

A skirt and a little trim around her top make her decent but I don't think there is enough definition around her waist so she definetly needs a corset.

Once I get her clothes just right it's time for my favorite part! Embellishment!!
She gets hair, of course! And jewelry! A chunky stone and bone necklace, shells and ribbons in her hair and a belt with pouches for all her little goodies.

Friday, November 13, 2009

Graveyard - MMC Part 9

I had so much fun making the graveyard. I used a foam core base and built it up with paper mache. The tombstones are made from polymer clay and then I landscaped the whole thing.

I cut some of my Bouganvilla branches to get those fabulous thorns.

I spent a lot of time trying to get some good tombstones. I used my celtic knot rubber stamps on some of them, layered beveled jewelry molds for others and a few of them I just hand carved funny names.


Saturday, July 25, 2009

Witchy Woman of the Woods- MMC Part 8


 I have never made a doll from scratch before so this is another element I left to my mom. She whipped this one out in no time and I think she is appropriately creepy looking!


 Every woman needs a little bling, even an old hag like her!


 I adore the frayed and tattered look of her dress.


 She even has a little beaded veil over her long gray hair.


Thursday, June 4, 2009

Scary Tree - MMC Part 7


I want several trees in my miniature scene but I wanted one really especially scary tree. I had visions of the mean tree from the Wizard of Oz that threw his apples at Dorothy. My mom took that idea and ran with it. In one afternoon she made this tree and his brother, the happy tree, for her fairy garden.


She used a wire mesh armature, covered it in clay and started sculpting. Once she had it looking amazingly like bark, she painted it many many times to pick up all the details.


I had also mentioned that I wanted to be able to light it from the inside so she left a hole in back for that purpose!


After attempting to make a few trees of my own (pictures coming soon) I am SO glad she took this one on herself!

Friday, May 1, 2009

Another Little Collage


This is another little collage I did because I have all these clay faces that I made a long time ago and wanted to use them on something. 


I started off with red tissue paper that I crumpled up and then flattened back out. I glued it down on to a piece of poster board and started painting it.


 I was in the mood to play with my beads so I choose a few small ones and played around until I came up with something I thought would work around the head. The face was plain white when I made it so more painting! Nothing too detailed, just some color!

I had to play around with the hair for awhile to get it just right. I used long pieces of wool and just wrapped and twirled it around until it looked interesting.  Once I had the hair right I used more beads to secure it and decided to glitterfy the makeup.


 I used fusible fibers, an old jewelry finding and a few more beads to finish it off. Then I attached the whole thing to a piece of foam core and glued heavy gold braid around the outside as a hanger.