Tuesday, March 31, 2009

Texas Renaissance Festival

We go to the Renaissance Festival every year and I have so many pictures I will probably never be able to scrap them all! These are from 2001.

Legends by Snowraven
Template by Vicki Stegall

Another Switch Plate

I have painted and repainted my craftroom several times but at the moment it is green. And of course I had to make switch plates to match. This is what I came up with this time!

Monday, March 23, 2009

Digital Scrapbooking

I've been scrapbooking since I was a teenager and about 2 years ago I started teaching myself how to use Paint Shop Pro and I've been digital scrapbooking ever since! When I first started digiscraping, I didn't make any notes about who created the graphics or templates that I used on each layout. Now I know better and I make sure I can credit people appropriately.

Little Punk by Akiloune
Template by Chrissy W

Foliage - MMC Part 5


Now that I have some of the biggest features completed (the path, crypt and swamp) I need to start working on foliage for the background. I collected all the dried floral arrangements again and got to it. I cut 3 thin strips of foam core and hot glued the foliage to them. Once they were full enough I covered the foam core with paper mache to give them a natural looking ground texture and to make them more stable.


 When the paper mache was dry I painted them and started layering on the landscape material.


 A little dirt and grass for the finishing touches and I really like the way they look!

Friday, March 20, 2009

My Inner Goddess


I love doing collage. It lets me incorporate many of the different things I like to do all in one project!


I had made this little goddess from clay a long time ago and she has been hanging around waiting for me to figure out what I wanted to do with her.


First off, I decided to make her blue and gave her a halter top. I think she needs more hair too!


 This is a close up of all the little details. I outlined her in purple fibers, gave her a headress and necklace and added beadwork to her clothing. I also used some fusible metallic fibers to give the whole thing a shimmery feel.


I used little lengths of beads to hold the metallic fibers in place then outlined the whole thing with some fuzzy black trim.

Thursday, March 19, 2009

My First Love - Beading

Ever since I was a small child one of the christmas presents my mom gets me every year is instructions and supplies for a new craft that I have never tried. When I was little it was paint by numbers, needlepoint and modeling clay. In my teens I got safety pin jewelry, a dollhouse and dreamcatchers. This year it was paper making! Whenever I had a technical problem, she was right there to help me work it out and whenever I had a creative problem she would tell me "Do it however YOU like it!" For that, I owe her BIG TIME!

When I was 15 or 16 I saw an advertisement for a beading class and she paid for us to go. It was a couple hours one night and the teacher showed us all the basics on stringing beads and attaching clasps. I was hooked! At first I worked with the big stone and acrylic beads but after making more jewelry than I will ever be able to wear I branched out and realized my passion for beadweaving with teeny tiny little glass beads. (For anyone that understands the lingo I use mostly 11/0 Delica and 10/0 Czech seed beads.)
These are just a few of my favorite creations.


Beaded cross stitch triskele


Beaded rose on craft wire


Beaded handbag


A cheap plastic dollar store bottle looks a lot better wrapped in beads!


Mini bottle necklace


I made this little wall hanging for my brother one year for christmas.


I made this hummingbird amulet bag for my mom a long time ago.


A little fairy


Suncatchers

Bathroom Redecorating


One of the first things I wanted to do when we bought this house was redo the bathrooms. They had this hideous floral wallpaper and the kids who had lived here had drawn in crayon behind the door... it was bad! I found a shower curtain that I fell in love with and used it as my inspiration. It has several shades of red and purple metallic fabric with a viney leaf motif embroidered in gold thread and the whole thing reminds me of a Gypsy Wagon so that is where I'm going with this.

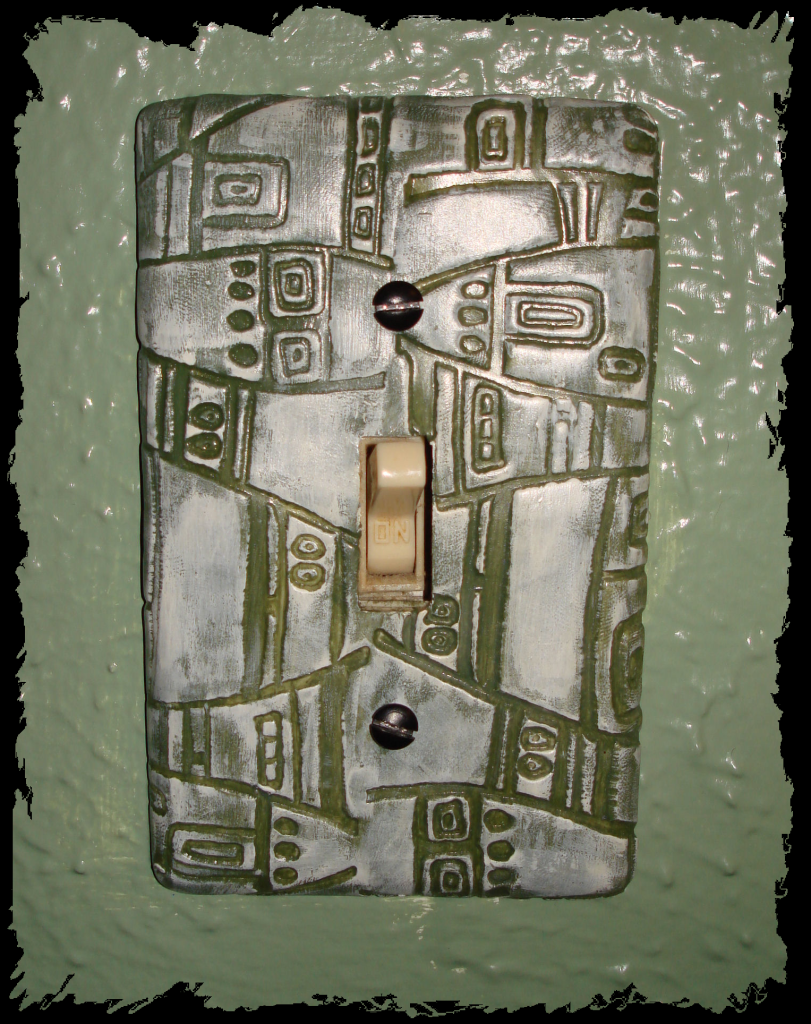
As always, the undoing was the hardest part. I removed the modern mirror and the corner medicine cabinet which took up too much space overhanging the tiny vanity. Then I started pealing wallpaper and realized there was more than one layer with a coat of paint in between. After a couple of days I finally had all the layers off and was down to bare walls. I also had a large hole near the shower where the wall had gotten wet and disintegrated. I patched that up and got to work on the REdo part. I picked out a deep purple color called Grape Jelly for the walls and decided to make custom switch plates for the light switch and electrical outlet.


 I bought a bunch of gold metallic clay and rolled out enough to cover the plates. I texturized it with a swirly pattern and cut out all the holes. Once the clay was cured I watered down some black acrylic paint and got that into all the indentations. It gave the clay a real old tarnished gold look.


Once I had that done they got a couple coats of poly for protection and shine. It looks milky in these photos because it's still wet but when it dries it's perfectly clear.


I liked these so much I decided to go one step further and do the TP holder too!


A few finishing touches and my bathroom looks amazing! I bought some red and purple towels, an antique framed mirror and dispensers that look like things someone picked up on their travels. As soon as I figure out how to take pictures in a bathroom the size of a coffin I will post them here!
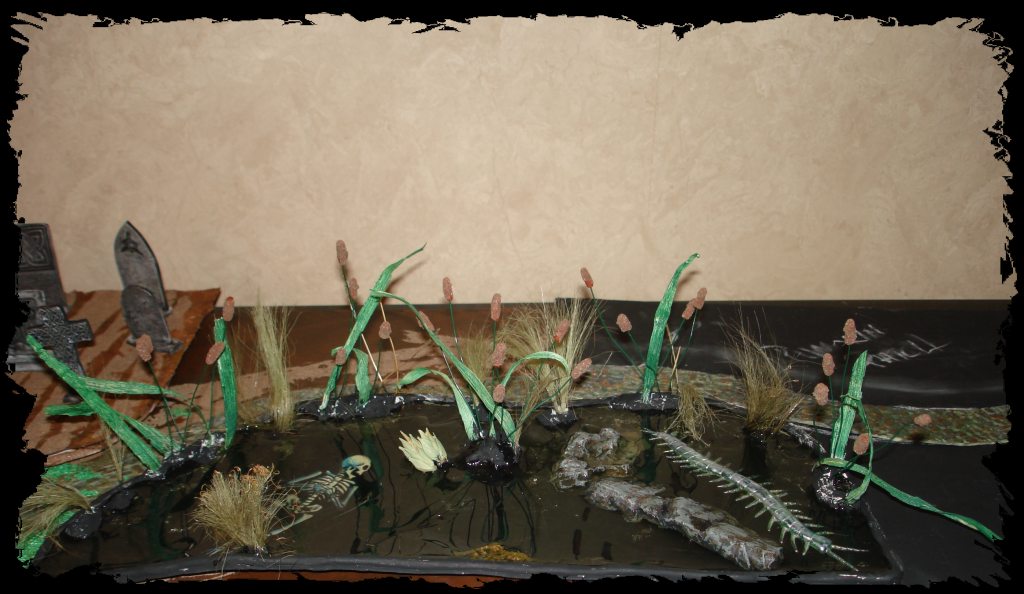
The Swamp - MMC Part 4


So the next phase in my little (HA!) project is a swamp. There is nothing creepier than a stagnant body of water with who knows what rotting and decaying just under the surface!


First, I had to make a bunch of stuff to fill the swamp. The rocks I made from paper mache and painted them with acrylics until they looked natural. Swamp grass and some water plants were mostly from old dried floral arrangements, mounted in more paper mache.


 And what is a marsh without cattails? I used brown clay to make the tops and stuck them onto green craft wire stems. Once the clay was cured I rolled the tops in glue and dipped them in sand. I painted some dried corn husk green and used that as the leaves.


 Once I had all the flora made I started assembling the actual swamp. I made a tissue paper template of the area it had to fit in and rolled out more clay for the base and sides. Once I had it all done I started filling it up.


 I found some more printable goodies online and this skeleton was perfect for the swamp!


Around Halloween I found a package of little rubber bugs and knew I could use the centipede in here. Once I had all these things glued down in place I started on the water. I did a lot of brainstorming on how to get realistic water and after some trial and error I decided to buy model railroad E-Z Water pellets. They were so much fun to work with! The instructions suggested melting them in a pot on the stove and pouring it, which really didn't work out that well, so I used my heat gun to melt them instead. That gave me much better control over where it went and not as many bubbles as pouring created.


Sunday, March 15, 2009

The Crypt - MMC Part 3


I should have taken more pictures at the beginning on this particular part of the project, but I didn't. I found a few websites that have free paper projects and this crypt was at Odissey Paper Models. It was easy and fun and it really turned out great! I changed it up a little and only used bits and pieces to achieve the look I wanted.


I attached the crypt and fence to a piece of foam core and landscaped around it. When that was all finished I realized it was too low and I went off in search of something to recycle that would give it some height.


I think this piece of cardboard was from my cellphone.


I used paper mache to give it some texture and added the stairs which I made from clay the same as the pathway. Of course then it was too tall and I had to cut the bottom off but eventually I got it just how I wanted it.


I attached the crypt onto the base and started with more landscaping. The more layers I do the better it looks so I try to do as many as possible!


Wednesday, March 11, 2009

The Pathway - MMC Part 2


Once I got everything sketched out in chalk I started on the pathway. I wanted it to twist and wind through the whole scene.


First I made tissue paper templates of the shape of the path I had drawn. I rolled out sheets of clay, applied a stone texture to it and then cut it along the template.


Once it was cured I started on the paint. After many many layers of a lot of different colors I ended up with a pretty realistic look.


Once all the paint dried I went ahead and glued the pathway right onto the foam core. Although a lot of what I put in here will be removeable, the pathway won't be. Everything else will grow up around it and I don't want it shifting or moving at all.


Close up of the finished pathway.


Sand and miniature landscaping grass fill in all the cracks around the path to make it look like it's been there a long time.